
 It is no secret that I love building blocks. I think that they’re a beautiful, versatile, creative, incredibly educational toy. And I think that adults are perfectly justified in playing with toys, too, just so you know.
I’ve explored lots of resources for purchasing sound, sturdy, eco-friendly building blocks, but they’re pricey, of course. And I’ve explored lots of methods for crafting my own building blocks, but without some great tools and some serious woodworking skills, crafting perfect, accurate building blocks is really difficult.
Unless you have a tree in your yard, that is! Here’s a quick tutorial, utilizing a minimum of power tools, for crafting some great building blocks from the simplest material in the world- a fallen tree branch:
You will need:
- A fallen tree branch. I am flush with fallen silver maple branches, but any sound fallen branch will do. Make sure it’s not rotten, moldy, or already split, and you’re good to go.
- A saw. Go ahead and use a hand saw if that’s what you’re into, but for me, I’m perfectly comfortable admitting my devastating weakness for power tools. My go-to piece of equipment for this project is a simple reciprocating handsaw, portable and versatile enough to allow me to cut up branches on my front porch steps. If you have a table saw, however, then feel free to whip out the big guns.
- Sandpaper. You’ll want to smooth out your cuts and slightly round all your edges, so even though your work won’t be splintery, go the extra mile here.
1. Choose your branches. Narrow branches do work well with this project, so don’t feel like you have to find the thickest, meanest branch in your yard just to make an impression.
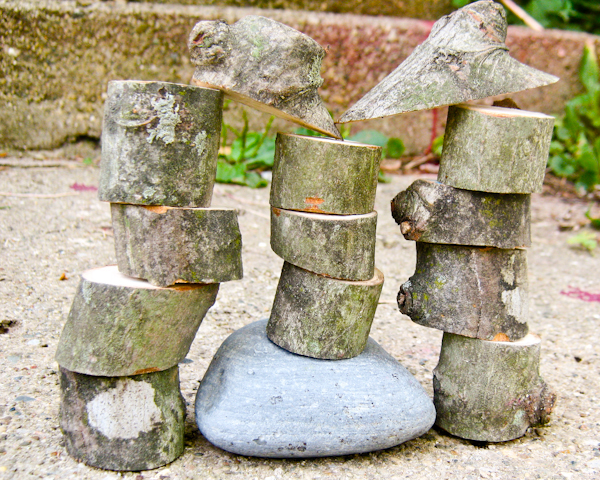
2. Saw each branch into block-sized pieces. The most balanced pieces will work out to be perfect cylinders, but these are natural blocks, so don’t get too futzy. As long as your cut is straight, not jagged or curved, then you’ve made a tree block.
3. Sand your cut edge and the corners of each block, and if the bark is crumbly or distracting, feel free to sand that down, as well.
You can seal these blocks, varnish them, or oil them, but I like my blocks bare naked.


Pingback: Great Green Blog Posts for the Week: 8/27/10 | Sustainablog
Some beautiful and handy tips you’ve shared Julie. Thanks for your contribution to nature building.
I love your idea of tree blocks.
That’s kind of our our house is being built by Whole Trees Architecture.
Check out my blog post from last week when the timber frame bents were hoisted into place. http://digginginthedriftless.wordpress.com/2012/06/08/up-up-and-away-raising-the-timber-frame-bents-at-underhill-house/
I think we will have to make some tree blocks to play with on the deck.
Pingback: Crafting a Green World | How-to: DIY Tree Branch Checkers | Page: 1 | Crafting a Green World
Pingback: Crafting a Green World | How-to: Ice Building Blocks for Outdoor Play | Page: 1 | Crafting a Green World
Pingback: Crafting a Green World | The home for green crafts and tutorials!
Pingback: Creativity tip: change your physical surroundings – Create and Connect