
My kids love the comfy, wide-legged, elastic-waisted, flannel and fleece pants that I sew them for the winter months, but seriously, how hard can it possibly be for them to simply not put the pants on backwards?!?
Super hard, if you ask them.
Even when the pants have knee pads and pockets, my kids seemed to put them on backwards more often than not. Of course, when your kid wears store-bought pants and shirts, you simply tell them, “Look for the tag, Sweetie. The tag goes in the back.” But homemade pants don’t HAVE clothing tags in the back!
Until I put them there, that is.
I was given (by a publicist? Marketer? PR Rep? I don’t know the difference) an Epson ribbon printer, and since then I have transformed my children’s handmade wardrobe by adding a tag on the back of each piece of clothing. My clothing tags are better than the tags on the backs of store-bought clothes, however. First of all, my tags are cute, so I put them on the outside of the garment, not the inside, where they would be scratchy. Second, my clothing tags are not scratchy! Third, my tags don’t have size information (although now that I think about it, that would actually be hella helpful. Must make a note to add size information to future tags…). Instead, because I’m REALLY nerdy, they have foreign language vocabulary terms on them. These… well, you’ll see in a minute, when I explain to you the depths of my nerdy, nerdy, nerdy mind.
Read on for the instructions, as well as the nerd terms:
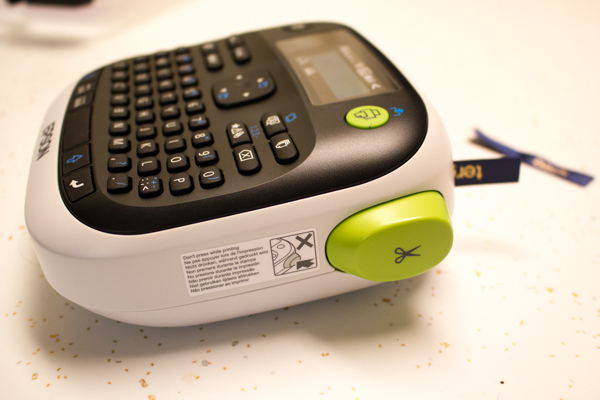 1. Set up the ribbon printer according to Epson’s instructions. The ribbon and ink are both contained inside a single cartridge that you pop in and out of the printer. You’ve got several color options for the ribbon and ink, but since this is kids’ clothing and my kids like color, I chose the blue/gold combo for them.
2. Print your labels. Okay, here’s where you find out exactly what a nerd I am [deep breath]. So I wanted to label the back of each garment, but I didn’t want the label just to say “back”–how boring is that? The kids are going to know that it’s the back of the garment just by seeing the label, so they don’t exactly need to read “back” over and over again anyway, you know? But… if they know the tag is going to say “back,” and they’re probably going to be glancing at it every time they touch the garment regardless, just out of habit, then why not sneak in a little bit of book-learning while it’s there?
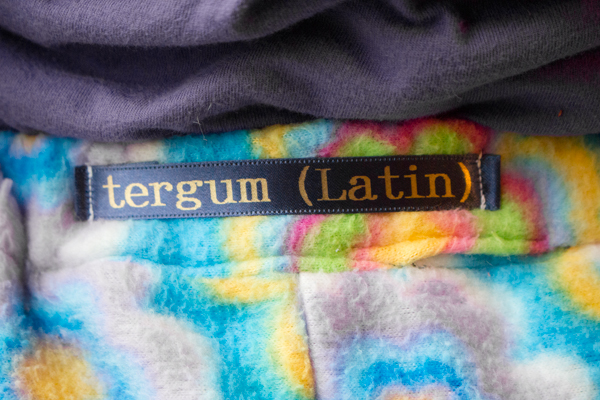
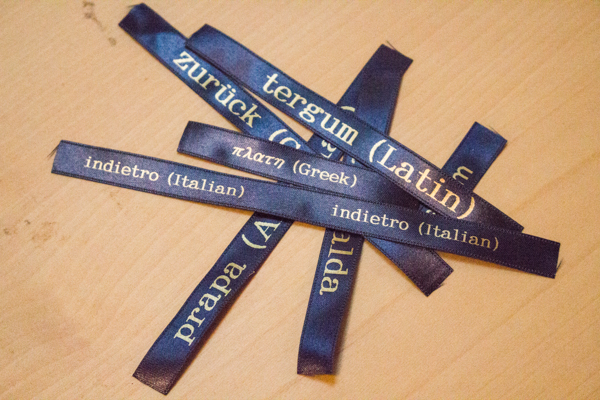 Using my collection of foreign language dictionaries, and a little bit of Google Translate for the languages that I haven’t studied, I translated the word “back” into many, many languages, making each its own label. For each label, I used the foreign word, and then, in parentheses, the word’s language. For instance, one tag reads “tergum (Latin).” Among many of the languages represented, I’ve got Icelandic, Spanish, Welsh, Italian, and Greek. The ribbon printer has a Greek alphabet (which explains the Greek language being represented), and it has all the diacritical marks (which explains the Welsh). It does not have a Cyrillic alphabet, alas, or a Chinese alphabet, so Russian and the Asian languages are out. Nevertheless, there’s a fair many of the world’s languages here to choose from.
Is that weird, making clothing tags with foreign language terms on them? Never mind, I know that it’s weird. But it also makes me really, really, REALLY happy, so there’s also that.
The only trick to printing these is to put about 1/2″ of blank space before and after each tag before you print and cut it, so that you’ll have enough seam allowance to sew it onto the garment. You do this as you’re typing the tag, since the printing and cut features are automated so that you can’t do your fiddling with dimensions there.
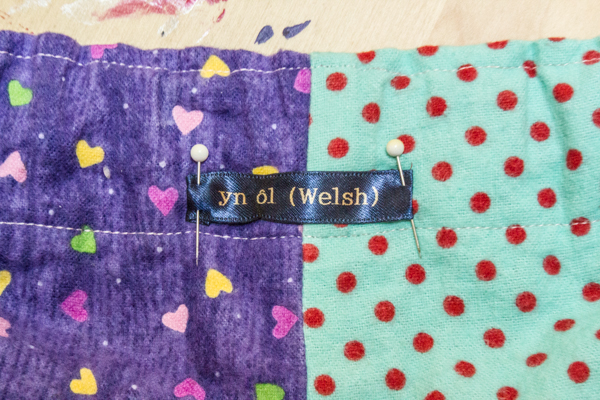 3. Sew the labels on. I folded each cut end of the ribbon label under by 1/4″ inch, set my iron to a low setting (these ribbons don’t do well with the hottest settings, so be wary), and ironed them to crease the folds. From there, it’s simply a matter of sewing the label onto the garment, going over each stitched line a few times, because I know good and well that a ribbon label is just begging for a kid to pick up that garment by the label, swing the garment around by the label–well, my kids are ruffians. Yours are probably better behaved.
4. Wash and dry as normal. I wash all our laundry on cold, unless something extremely drastic has happened to it (that head lice epidemic of 2010 remains long in memory…), and even though the ribbons with the Epson kit contain no washing instructions, they handle that temperature just fine.
I’d be lying if I said that now my kids NEVER put their pants on backwards, because they’re my kids, and I’m pretty sure their mutual goal is to do everything backwards, but these tags have greatly reduced the frequency, at least, and when they do happen to get it wrong, I can finally say the words, “Look for the tag, Sweetie. The tag goes in the back.”
[I received an Epson Ribbon Printer Kit free, because I can’t write about something if it hasn’t inspired me to learn the Welsh word for “back” (it’s yn ol).]


So. Awesome. That is such a genius sneaky way to get some extra learning into them! One more reason I need to get my but in gear and sew my kid some pants (that and we can’t EVERY find pants that fit her properly).
I know, right? And my two kids have two very different builds, so I can also never find them pants that fit them both properly in the same store, as I learned when we went shopping for jeans for horseback riding. Usually, if I need to buy them pants, I pick up a stack from Goodwill, make them try them on at home, and then just return what doesn’t fit.
great info!