
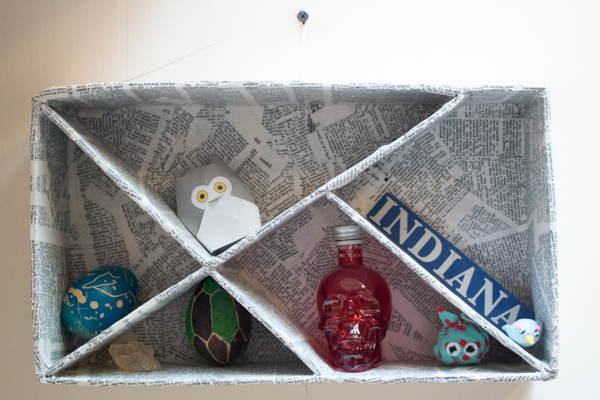
ALL MY THINGS bring me joy. I am not giving up a single one of my priceless possessions, whether that possession is a dragon egg-themed Easter egg, a tiny skull-shaped bottle, a handmade polymer clay narwhal, or the name of my home state cut out of a license plate.
Why do I have the name of my home state cut out of a license plate? Don’t remember. Don’t care. But I am KEEPING IT.
As I’ve discovered, one’s priceless possessions look less like you’re a hoarder when they’re displayed nicely so that you can enjoy them, not piled up on top of your dresser gathering dust. Storing your little treasures nicely is as easy as arranging them in a shadow box, and making that shadow box is as easy as cutting and pasting.
You learned how to do that stuff in kindergarten. You can totally do this.
Why make a shadow box instead of buying one? Well, it’s cheaper, for one thing. And it’s better for the environment because these shadow boxes are made from corrugated cardboard and old papers, not particle board and plastic. And you will absolutely LOVE the way that you can customize each shadow box to have exactly the shape and the shelves that you want.
Seriously, hot glue is a miracle of science.
I think that these DIY shadow boxes look nice, and most importantly, they keep your stuff stored and on display so that you can enjoy it. Check out how to make your own, and then get your own stuff off your dresser and displayed like you love it!
Supplies & Tools
You will need:
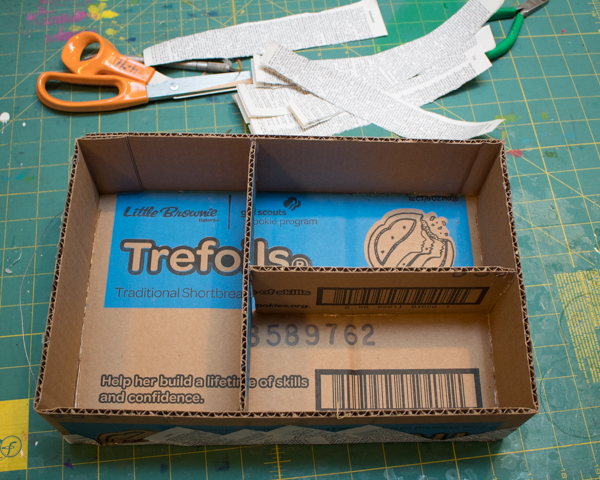
- Corrugated cardboard. All of the cardboard that I’m using in this project comes from cases of Girl Scout cookies. Ask a Girl Scout of your own, and I’m sure she’ll be thrilled to offload some to you, too.
- Xacto knife
- Metal Ruler
- Self-healing cutting mat.
- Hot glue gun and hot glue.
- Stash wire, sturdy enough to hold your shadow box full of treasures
- White glue, water, and a container to mix it in
- Paper. I’ve used old book pages, sheet music, comic books, and even plain newspaper for these shadow boxes.
- Optional materials: paint and polyurethane sealant. Paint can cover ugly papers, such as newspaper, and polyurethane sealant will make your shadow box sturdier and easier to wipe off, and will keep the surface from getting sticky over time (that can sometimes be a problem with glue-based decoupage, so definitely consider it if you plan to put something legitimately precious in your shadow box)
Directions
1. Make the outside frame of the shadow box.
Find a box whose area you like for your shadow box, and break it down and lay it flat on top of your self-healing cutting mat. You’ll be cutting the top and bottom off of the box, and then cutting it into a strip that will equal the depth of your shadow box. I really like three inches for this, although I used four inches for the shadow box that holds my friendship rocks and that depth works well, too.
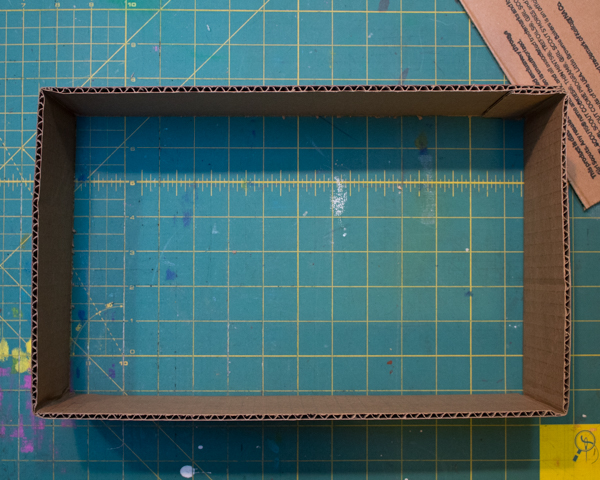
Open up the strip that you cut and stand it up on your cutting mat; this is the outside frame of your shadow box!
2. Add a back to the shadow box.
Set your shadow box frame on top of another piece of corrugated cardboard with at least the same area as the frame; if you’re using Girl Scout cookie cases, one of the larger sides of a second case is perfect for this.
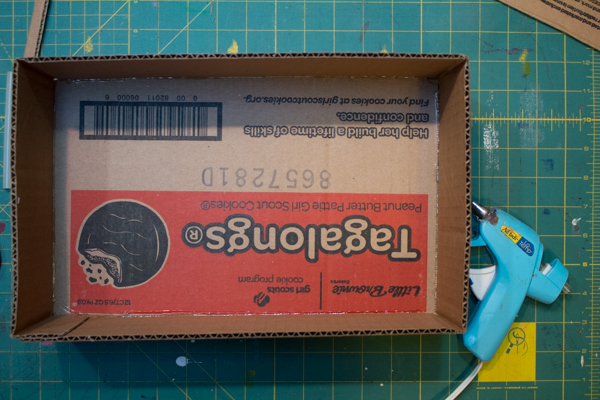
Hot glue the back to the frame all the way around, and then cut away any excess cardboard.
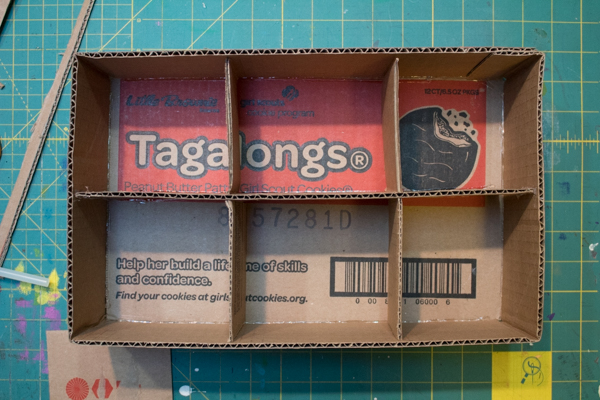
3. Add shelves.
Cut more corrugated cardboard strips the same width as the shadow box frame, and then use those strips to add shelves to the shadowbox. Use hot glue to tack the shelves down, but you’ll be securing them much better a little later.
4. Add a hanging wire to the shadow box.
Hot glue a length of wire or cording to the sides of the shadow box, making a loop that goes over the top of the shadow box for hanging. Don’t secure the hanging wire to the back of the shadow box (as I did on my very first attempt at making this project), because if you do, the shadow box will tend to tip forward when it’s filled and hung. Securing the wire to the sides of the shadow box will even out its balance a little better.
5. Decoupage the shadow box.
If you liked the look of the raw cardboard, you could be just about done with your project there. I think these shadow boxes look nicer and are sturdier when decoupaged, however. To do this, choose a fun paper and tear it into strips. Pour a 1:1 mixture of white glue and water into a jar and stir it up. Piece by piece, dip a strip of paper into the mixture, strip off excess glue with your fingers, and smooth it onto the shadow box.
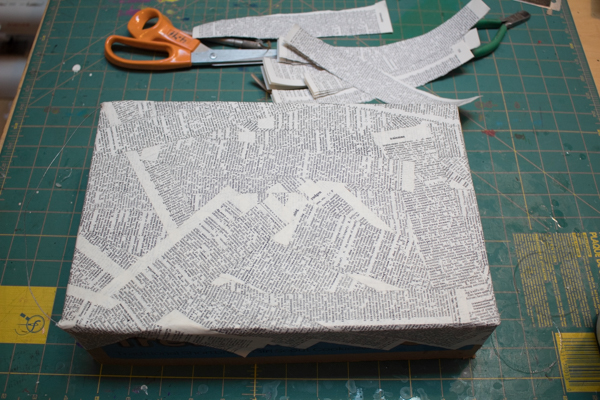
Overlap as necessary to cover the entire surface area of the shadow box. I like to cover the back first, let it dry, and then cover the front.
Covering the front will take a lot more time, as you use lots of paper to cover all those fiddly corners and seams.
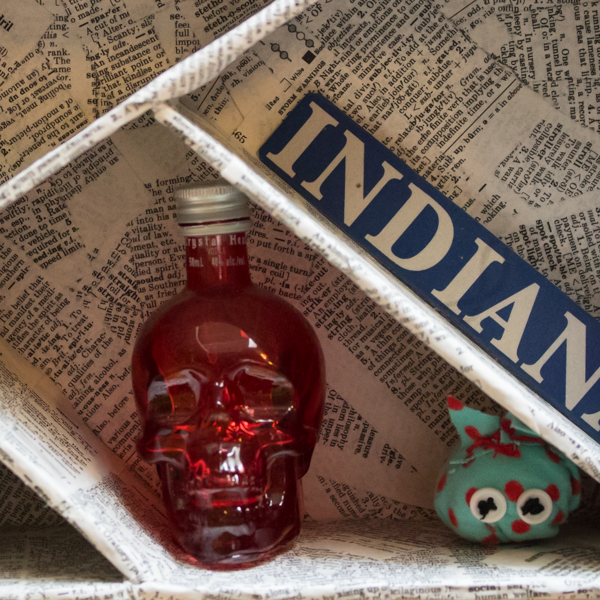
Let the glue dry well, and then you can paint or seal your shadow box if you wish. After that, it’s ready to be enjoyed! What will you display in your DIY shadow box? Let us know in the comments!


I love projects like this use things you probably already have on hand. I also love how you covered your shadow box with newspaper. Very nice!