
Are you Team Wrapping Paper or Team Gift Bag?
Once upon a time, I was Team Wrapping Paper. I liked using unusual ephemera, or embellishing large-format blank paper. It was fun to upcycle paper, and I loved how cute and unique my presents looked.
The problem, though, is that even upcycled wrapping paper generally gets thrown away after the present is opened. Not even my Depression-raised grandparents, who saved bread bags and rubber bands, spent Christmas afternoon picking the tape off of wrapping paper and saving it to be re-used.
Gift bags, though? Re-using gift bags is basically a personality trait around here! It’s pretty much canon in my parent circle to pass the same four gift bags around from party to party. I hand off a gift bag to my kid to put her friend’s birthday gift in, and I guarantee I’ll see it again one day, whether it’s next Christmas or two birthdays from now, only this time it’ll be sporting a tag with my own kid’s name on it.
DIY gift bags, made using that same ephemera, large-format blank paper, or even upcycled wrapping paper, give you a lot more upcycling bang for your upcycling buck. Use them for as many holidays as you can get away with, and then, when they’re finally falling apart, remove the handles and put the rest of the gift bag back in the recycling bin from whence it came.
Supplies
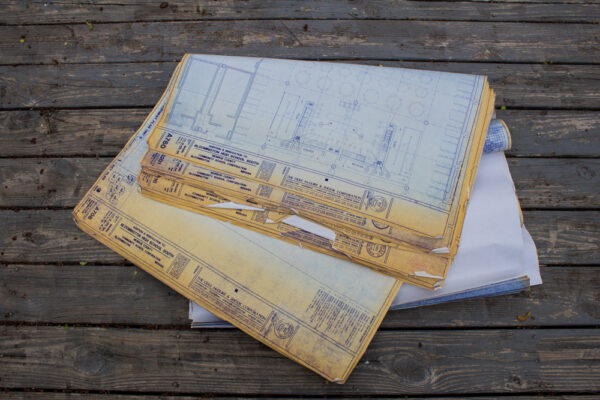
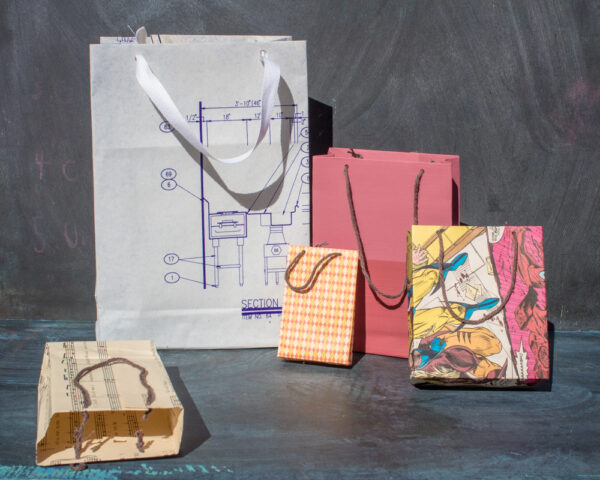
- paper. Depending on the size of gift bag that you’re aiming for, you can use any kind of paper from origami squares to sheet music, brown paper bags, stash wrapping paper, newspaper, or wallpaper–feel free to be creative! In this tutorial, I’m using some old blueprints that I scored once upon a time from my town’s recycling center.
- hot glue or double-sided tape. Both work well and have good longevity.
- hole punch. I like this 1/8″ hole punch for twine and ribbon, but a standard 1/4″ hole punch is great for twill and cording.
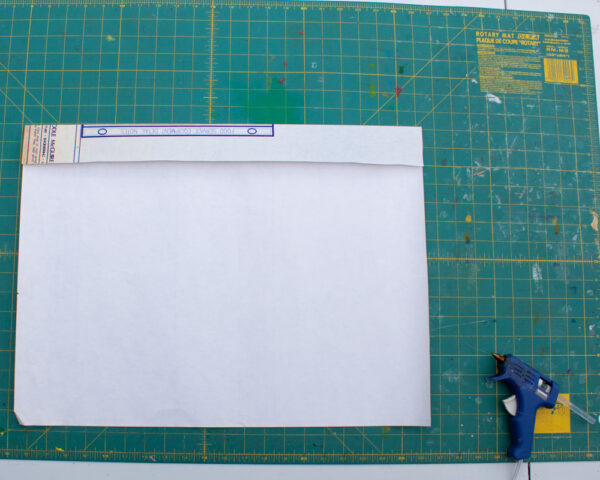
Step 1
Lay your paper face-side down. You can create gift bags from paper of most dimensions, but you’ll get the most conventional-looking shape from paper that’s wider than it is tall, laid out landscape-wise.
Fold the top of the paper down to create a clean top edge and to give extra strength to the handles you’ll be adding later.
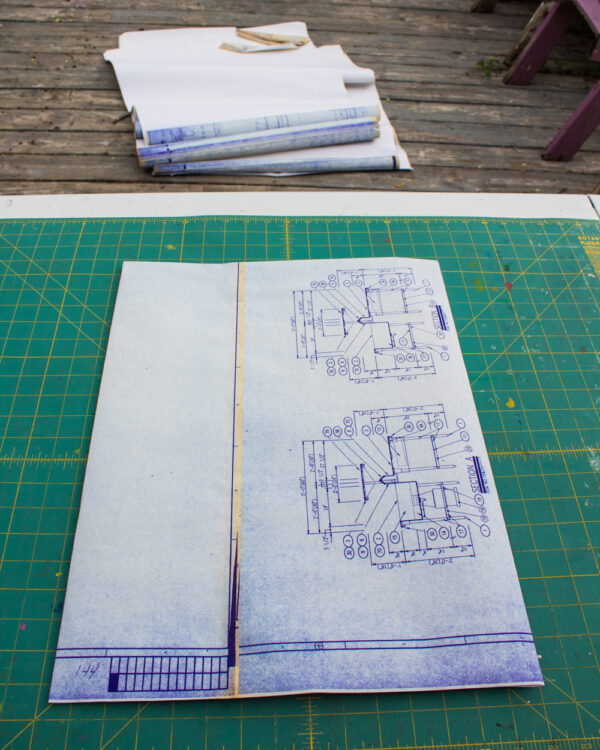
Step 2
Fold one side of the paper to the middle and crease, then fold the other side to overlap it. Glue the overlap down, and you’ll have what is essentially a flattened paper tube.
This overlap will be your back seam.
Step 3
Fold the bottom of the gift bag up and crease. It’s helpful to do this on top of a gridded cutting mat so you can keep your folds even.
If you want to embellish the outside of your gift bag with drawing, painting, or decoupage, this is a great time to do so. Just remember that anything below that fold will be on the bottom of your gift bag!
When you finish embellishing, open up the folded piece and flatten the corners. You’ll see a triangle on each side, with a crease down the base of each triangle that lines up with the fold.

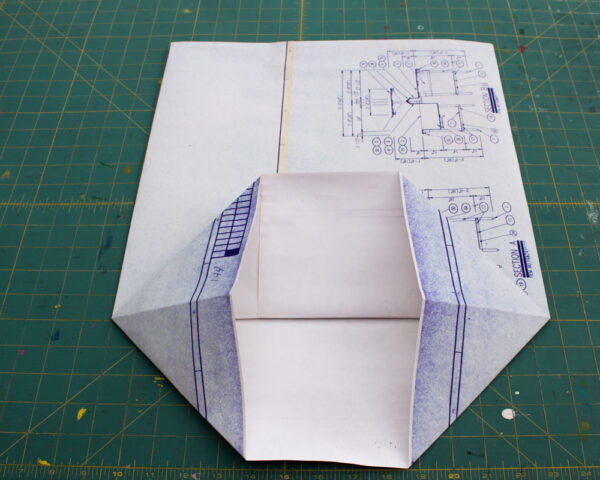
Step 4
Fold the top edge down far enough that to cross the center crease, then fold the top edge up to overlap it. The corners of the top fold must match the corners of the bottom fold, or your finished gift bag will be crooked.
Glue the overlap. To make your gift bag sturdier, you can also glue the overlapping flaps to those triangles on each side, but you have to be very careful that you don’t accidentally glue any of these parts to the inside of your gift bag, dang it.
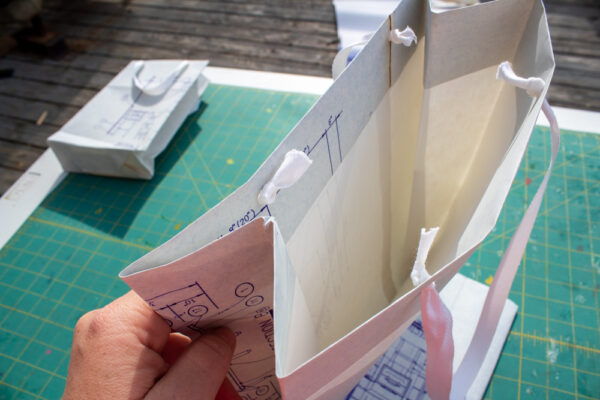
See the nice accordion folds at the sides of the bag in that above photo? To get that nice fold, refer back to the Step 4 photo and notice how perfectly you lined up the corners of the top flap with the corners of the bottom flap when you overlapped them to form your gift bag’s bottom.
Use that vertical alignment as your guide to fold both sides of the gift bag in, so that you now have a crease all the way up and down your bag, exactly at that vertical line. Open the bag and coax the creases into the nice accordion fold that you see above.
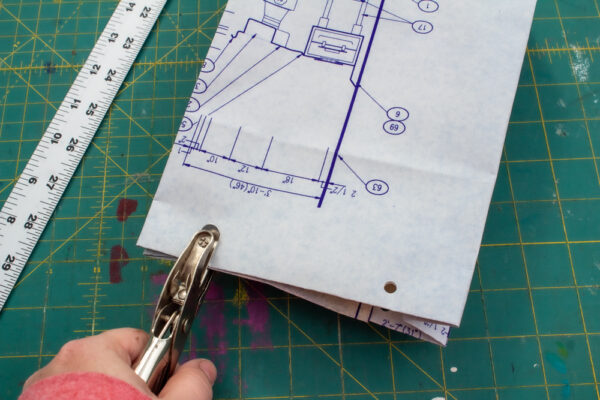
Step 5
Hole punch the gift bag to make the insertion points for the handles, then insert yarn, ribbon, or wire–whatever you like! Upcycle an old necklace, or braid several strands of embroidery floss. Cut up a non-functional USB cord, or use up the last of some stash bias tape.
Embellishing these gift bags is where I have the most fun. Since you’re using your own upcycled or stash paper, it’s possible to reserve a few inches of extra paper to make a perfectly matched gift tag, or even to create a perfectly matched greeting card or envelope.
If you’ve got even more matching paper, shred it and use it instead of tissue paper to hide your gift bag’s contents from sneaky eyes.
P.S. Do you prefer sewing to papercrafting? Fabric gift bags are also fun and easy to make!


Really hard to visualize this. Can you break it down into more steps with more images. I’ve made new elopes for years so idea of bags intrigues me