
 Are you intrigued by what you’ve heard about rolled beeswax candles? Want to know more?
Are they really THAT easy to make? (They are.)
Do they really make your house smell like honey? (They do!)
Will you really become addicted to making them? (Yes, you most assuredly will.)
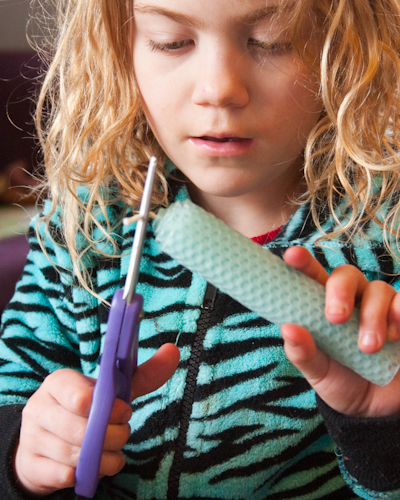
Not only is making rolled beeswax candles one of my favorite craft projects, but it’s also one of my six-year-old daughter’s favorite craft projects, as well. So read on, because we’re both going to show you exactly how to make rolled beeswax candles for yourself, and trust me, if the six-year-old can do it, then so can you.
 To start your project, you’ll need to acquire beeswax sheets and candle wicking. For the wicking, buy the type that you can cut to size yourself, because you’ll want to play with all lengths of candles, I bet.
For the beeswax sheets, if you’re lucky you can find some locally, perhaps from a honey farm or a candle supply store. I know you’ll ask, so I’ll go ahead and tell you that I buy my beeswax sheets and candle wicking in bulk from Knorr Beeswax–and no, they don’t pay me to tell you that! To mitigate the harm (and the expense) of shipping, I try to buy all that I think my family will use for the coming year in a single order.
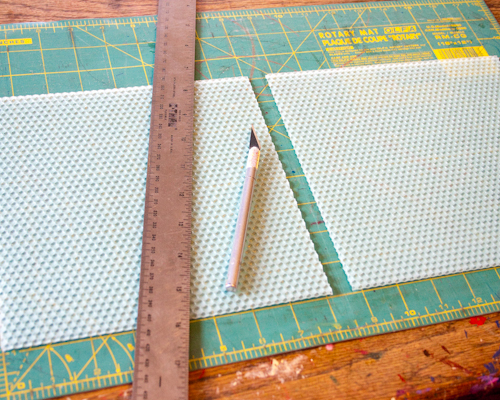
The beeswax sheets will be much larger than you’ll likely need for a single candle, so you’ll want to cut them to size. Although you’ll want to play with sizing as you become more familiar with rolled candlemaking, here are a few of my favorite sizes that work well within the standard sizes of the large sheets:
- regular candle=8″x8″ sheet
- short candle=4″x8″ sheet
- tapered candle=three 8″x8″ sheets, cut in half along the diagonal
- birthday candle=2″x2″ sheet
Save every bit of beeswax that you trim off of your sheets, because later I’ll tell you how to use even tiny bits to decorate your candles.
Next >>
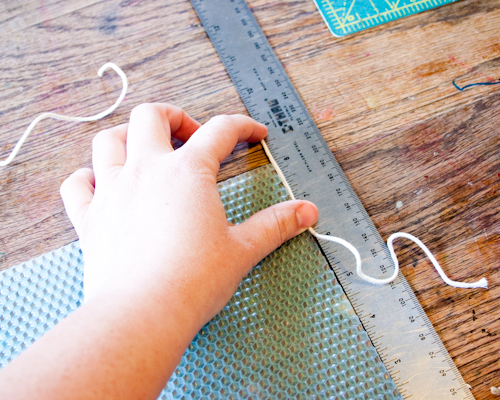 Decide which side of your cut sheet you’d like to be the candle’s length, then measure and cut a length of candle wick about 1/2″ longer than the length of that side.
Candle wicks have a top and a bottom–don’t mix them up!
Next >>
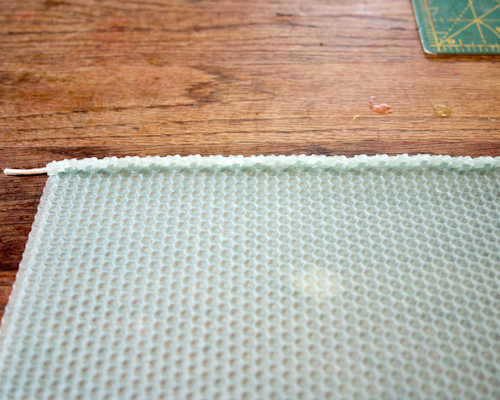
 Lay the wick along the length of the beeswax sheet, all the way at the edge, with the bottom of the wick lined up with the bottom of the sheet.
Using your fingers, press the wick into the beeswax all along its length.
Next >>
 Roll the beeswax sheet firmly around the wick just once, just enough to completely cover the wick, and make sure that the beeswax is pressed into the wick.
You’ll be rolling the rest of the candle much more gently, but you do want to make sure that the wick has good contact with the beeswax, so this first roll is the most important.
Next >>
 Roll up the rest of the beeswax candle, gently and evenly. The beeswax sheet is easy to roll, so you won’t need to exert much force here.
In fact, the beeswax sheet is malleable enough that using too much pressure will flatten or otherwise warp it–easy does it!
When the sheet is completely rolled around the wick, press the outside edge into the candle. The softness of the beeswax and the warmth of your fingers will stick it to the candle with a barely noticeable seam.
Next >>
 Trim any unevenness at the top and bottom of the candle (or simply press uneven parts down into the candle), and trim the top wick to about 1/4″.
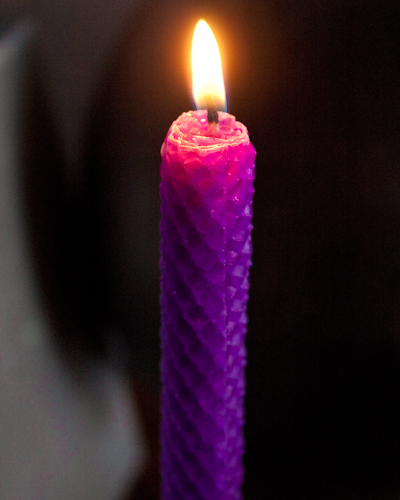
Your candle is ready to be lit!
Once you’ve mastered this basic skill, you can become more creative with your rolled beeswax candles, rolling two or three sheets together, or pressing cut-outs from the beeswax sheets decoratively around the outside of the candle, or making tapered, twisting, or any other design that you can imagine.
And when you light your beautiful, sweet-smelling beeswax candle up for the first time one dark evening?
Well, I warned you that you’d become addicted to making them.


I find it *really* hard to do this evenly, or even sort-of evenly. Do you have any tips? It doesn’t matter how many times I roll, un-roll, and re-roll.
If you look REALLY closely at the beeswax sheet, you’ll see that although the honeycomb pattern lines up on the diagonal one way, it lines up in a straight vertical line the other way. I like to roll so that I’m rolling down that vertical line, and by keeping that line matched between the candle and the unrolled sheet as I’m rolling it up, I’m able to keep the candle perfectly lined up.
If it’s totally impossible, though, for you to keep it even, just make it a style element!
Pingback: How-to: Rolled Beeswax Tealight Candles
Pingback: How-to: A Recipe for Natural Beeswax Wood Polish
Your how-to has inspired me to make rolled beeswax candles for my wedding !! (14 months away, so here goes). But I wanted to mention that Knorr Beeswax lists 20 sheets for $50, but candlewic.com lists them much cheaper (referenced on martha stewart’s how-to candle thingy) 10 sheets for $16.50, or 50 sheets for $68.50…. Although, I haven’t been able to compare shipping or quality – only quantity.
Pingback: Crafting a Green World | Cut a Fallen Tree Branch and Make Something: 11 Nature Crafts from Upcycled Wood Slices | Page: 1 | Crafting a Green World
Pingback: Crafting a Green World | Review: Rolled Beeswax Honeycomb Sheets from Knorr Beeswax | Page: 1 | Crafting a Green World
Pingback: sparkle craft – birthday magic: candles | Sparkle Stories Blog
Pingback: How to Make a Teacup Candle Holder - Crafting a Green World