
Would you like to sew a quilt using only your fabric scraps that are so small that any normal crafter would toss them in the trash?
You bet you would!
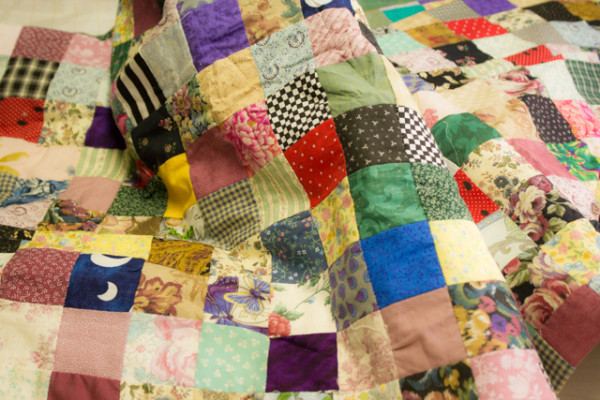
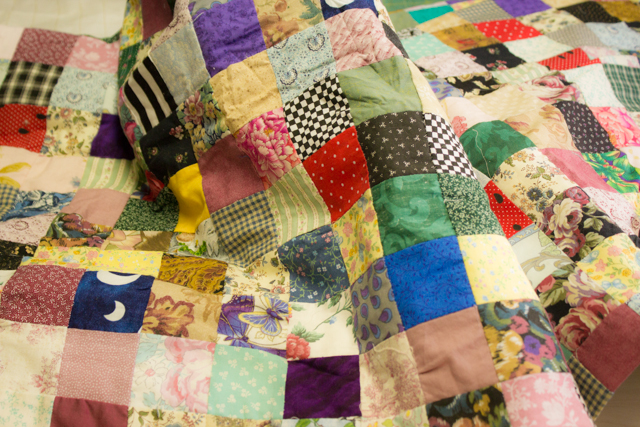
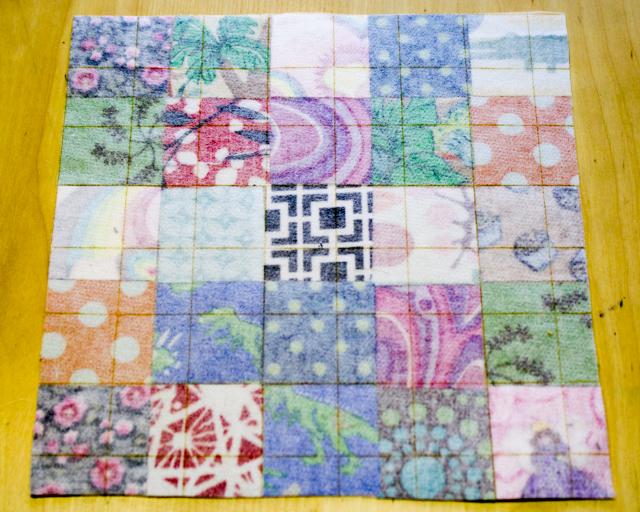
Postage stamp quilts have no rhyme or reason other than that they’re made of teeny, tiny (1.5″ tiny!) squares of fabric. You can trade postage stamp quilt squares with other crafters, or sew entirely from your own scraps. I’ve been working on my postage stamp quilt for years, now, and I don’t expect to finish it until I’m old. My quilt blocks have fabrics from the first gifts that I sewed for my daughters, from fabrics that I dearly loved, used up, and then forgot about until I noticed them again in this quilt, and fabrics that are scraps from the curtains, pajamas and quilts that we’re using right now. It’s my own version of (nearly) zero waste fashion!
Here’s how to start creating your own postage stamp quilt:
Fabric: For the most accurately sewn result, use only your fabric scraps that are approximately the same weight. I do combine quilting cottons, flannels, vintage polyesters, and even the occasional silk scrap (if it’s VERY special), but I do not use jersey knits, denim, or upholstery fabric in my postage stamp quilt. Those types of scraps can be used as part of a felt and fabric matching game for children, if you’d like to preserve them.
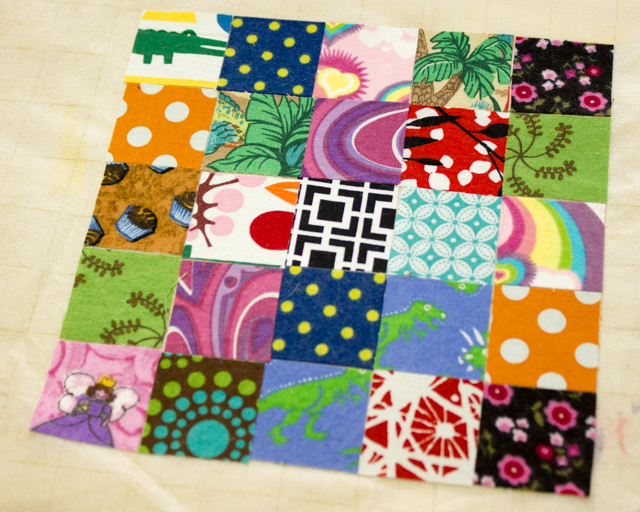
Sizing: Although you can sew your quilt however you like, the traditional postage stamp quilt is sewn from 1.5″ square pieces, which are sewn with 1/4″ seams, so that the result is a finished quilt consisting entirely of 1″ squares. The finished quilt is astounding, but, of course, starting with 3″ squares will get you done in half the time, so there you go. Go a little larger, and include just two of each fabric, and you can make yourself an I Spy quilt.
Sewing: The process for sewing a postage stamp quilt is actually surprisingly easy. Here’s a really simple way to handle the construction:
Next >>
1. Cut out a square number of pieces very accurately. You could go as high as 100 pieces, but 25 is about as high as I can get before I get impatient to sew them together.
2. Arrange your pieces very carefully into a large square on top of gridded fusible interfacing. Gridded fusible interfacing has a grid printed right on it, usually in 1″ increments, so you see how you can lay out all your squares perfectly accurately on it. Alternately, you can draw your own grid onto the non-fusible side of blank interfacing, or, for the most eco-friendly (and most tedious) solution, you can do without the interfacing altogether, and piece the quilt just as you would one with larger squares.
Iron the squares to the interfacing, being careful not to shift any of them as you do.
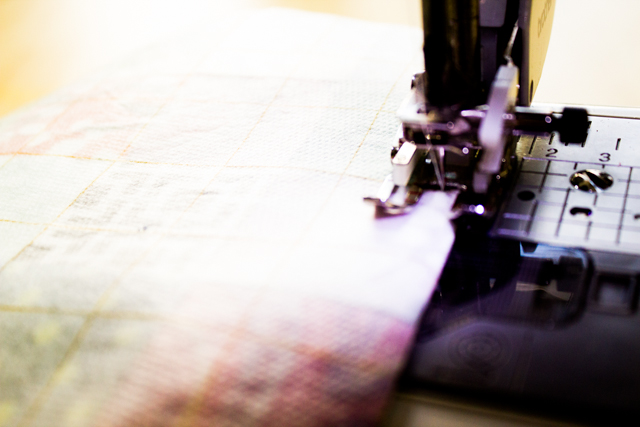
3. It should be easy to valley fold one entire row of squares, right sides together–you can use the grid lines to make sure that the fold is perfect. Sew through both layers of interfacing to sew these two rows of squares together with a 1/4″ seam allowance. Do the same for all of the rows.
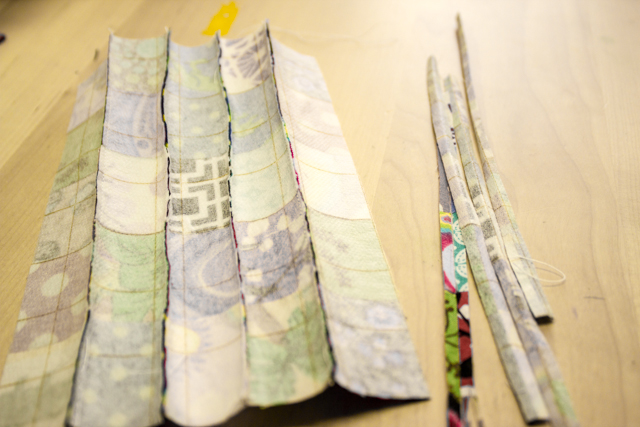
4. Trim the excess interfacing and fabric away from each seam, close to the stitching. I also like to snip a little further into each seam at the point where this seam will intersect its perpendicular ones–just don’t snip the stitches! Iron the seams flat. The interfacing is so thick that I also have to stretch the block out a little as I iron, to fully extend the fabric; otherwise, it likes to stay folded and warp the perpendicular stitching.
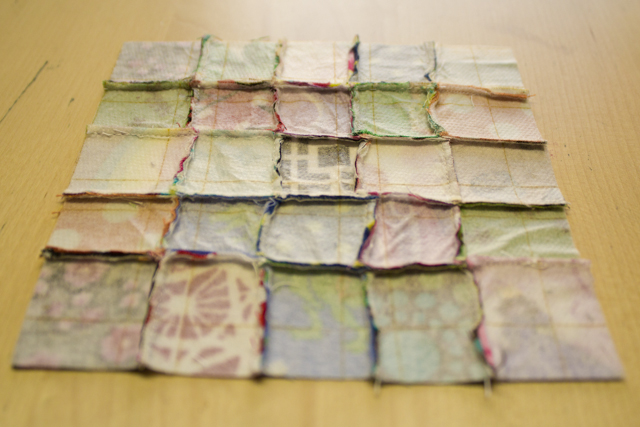
5. Sew the perpendicular rows just as you did their intersecting ones, again trimming the seams and ironing them flat.
Since the block is fused AND sewn to interfacing, it stores really well. You can store blocks until you have enough to sew one entire row of your quilt, then just keep doing the same every few months as you go about your life.
Until that one day, after you’ve just sewn on one more row, when you’ll realize that all you have left to do now is back your quilt and bind it!


Ok, this is the coolest trick I’ve learned in a while. We don’t have a lot of scraps at the moment, but I think I might have to pick out a few that we do have and put them in a shoe box with this post printed out. Most of my sewing lately has been from out-grown clothes or hand-me-downs, but I do have a few special pieces I think.
Thanks!
Keep an eye open at Thrift Shops, Church and Charity “Rummage Sales/ Indoor Garage Sales” and even Ordinary Garage Sales. I have picked up Baggies full of small scraps, and if I have too many of a print I can always swop with a friend! Mind you I have scraps from making my own clothes in my early teens; and I’m well and truly a “Senior” now! Also I have seen many “Novelty Prints” that when cut into small pieces will yield many different squares. Sometimes those “PANELS” provide a huge assortment, also those no longer fashionable pieces that you cut up and sewn to make a “Christmas Stocking”, a “Dressed Doll or Bunny”, and the rest.
You could also put a set of 20 3″ squares into SIX envelope and send it to Six pals Each person removes their set of 20 pieces and puts 20 pieces in to Six envelopes to send on to six of their pals then posts it on. By the time they all get back to you you will receive Six sets of 20 pieces of totally different fabrics.
Thanks for sharing a great idea to make a quilt with all those little pieces of fabric I’ve been saving for years!
I will try it out!
Excellent idea. I’m in the process of cutting my scraps into squares everywhere from 5.5 down to 1.5”. Sewing 3.5 traditionally but when looking at those 1.5 I was thinking maybe I’m being crazy. THIS idea is fantastic. I’m trying to visualize if one could do single rows/steps and then do a quilt as you go method not sewing the strips onto the batting and to each other as you go. Thoughts?