
 My four-year-old daughter recently came up to me and asked, “Momma, can I have a plastic pony playset?”
A pony playset. Plastic.
Did she get the idea from a friend? From an ad in a children’s magazine? Did the idea just sprout from her imagination? Who knows?
The answer: no. Instead, the kiddo and I discussed the kinds of features that she’d like to see in a pony playset, we dug through the recycling bins a bit, and then we set to work and made the very fun, very versatile playset of my child’s dreams. It’s portable, recycled, and can be put to use with everything from dinosaurs to Matchbox cars. Here’s how to make it:
You will need:
- two pizza boxes, delivery or store-bought, both the same size. The size of these boxes will determine the size of your playset. Are you a small apartment-dweller? Think personal pan pizza!
- hot glue gun and hot glue
- sturdy scissors to cut cardboard
- homemade play dough
- waxed paper or aluminum foil. I used waxed paper to make a stick-free surface for our play dough, but I’ll also provide directions for using aluminum foil to make your playset water-tight, so that you can float boats or put a duck pond on your farm.
1. Cut off the bottom of each pizza box, including the entire back hinge piece.
2. Put the two pizza box bottoms side by side, with the two backing pieces facing each other. Overlap those back hinge pieces, and glue in place.
3. Most pizza boxes will also have tabs on the sides of the box, to either side of the back hinge. Overlap these tabs on each side and glue them together to make the sides sturdier.
If your pizza box doesn’t have these tabs, you can cut a piece from the pizza box tops to glue across the gap in the box sides on either side of the back hinge.
4. Unroll enough waxed paper or aluminum foil to cover the entire bottom of your playset. Run a bead of hot glue along all inside corners of the box, then press the paper or foil down into these corners. Do the same at every seam between strips of paper or foil, and at the borders where the paper or foil meets the cardboard of the playset. For the best results, carry the paper or foil over the top edge of the playset and glue it down on the outside side of the pizza boxes.
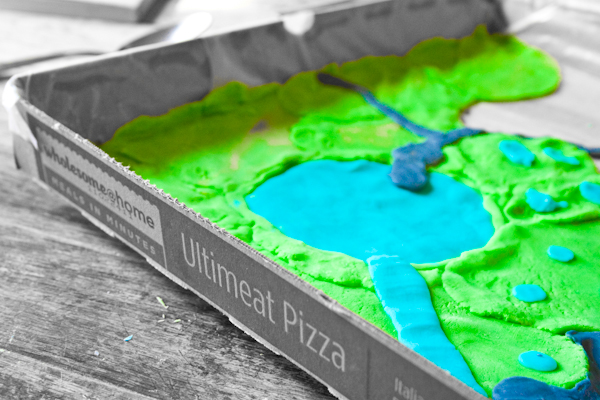
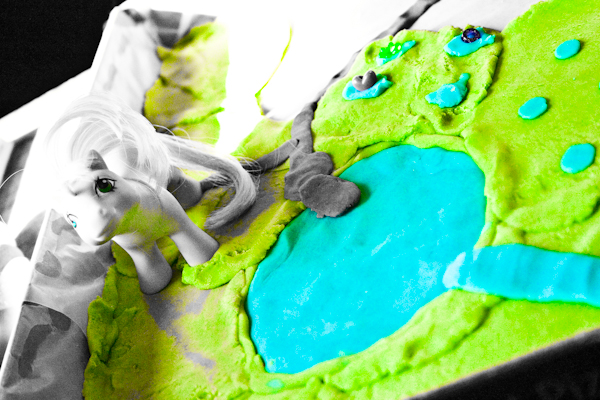 You can paint or decorate your new playset however you’d like, but its main advantage is its simplicity. My kiddos and I cook up several batches of play dough in greens, browns, blues, and greys to spread over the playset as landscape and arrange into hills, fields, ponds, roads, and farmland. Building blocks and Legos make buildings, walls, and fences, and the children’s own toys are the playthings.
If you’ve used play dough in your playset, the playset should be cleaned up each evening and the play dough returned to airtight storage. However, you can also put river rocks or sand into your playset, or grow chia in it for a fairy garden. In between play, store the playset on a high shelf, or slip it under the couch or between a bookshelf and the wall.


Could there possibly be more assembly pictures? I think the play box is a wonderful idea and I would like to make one, however, I can’t quite understand the directions.
Sure, I’ll post some more pictures the next time I make a playset. Until then, it often works really well to ask specific questions in the commments section–authors and other readers always love to help out.
Pingback: DIY : Pizza box playset | Recyclart