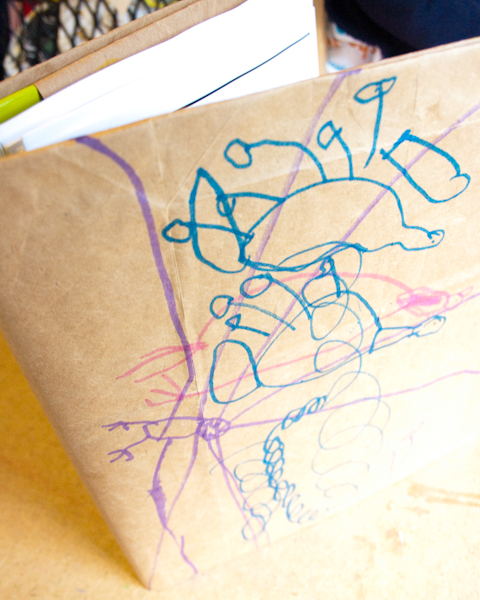
 You know you did this project in grade school, every year, every textbook. But have you done it since?
When is the last time that you made yourself a brown paper bag book cover?
I recently revisited this project myself, when I wanted to set up a couple of boring binders as my homeschooling little girls’ unit study books. And it took a while to remember exactly how to make these book covers, but as I finished them and as the girls happily decorated them, I remembered all the reasons that we used to make these as kids, and all those reasons are STILL great.
First of all, you get to save some wear to your book. Whether it’s a homeschool binder that you want to use for years to come or that hard-cover self-help book that you read every single time some loser breaks up with you, protecting your possessions from undue wear and tear keeps you from having to replace them.
Also, though, the blank slate that a brown paper bag gives to your book is a terrific outlet for creativity. Ink in your own book cover! Decoupage photos of your cat! Embroider the title (or make up a title)! Here’s how to do it:
You will need:
- brown paper grocery bag
- scissors suitable for paper
1. Cut the bottom out of your paper bag, and cut down one side of the bag so that you can lay it out completely flat on your work surface. As an option, you can iron the bag briefly to make it neat as a pin, but this isn’t necessary.
 2. If you’re covering a book that’s smaller, such as a hardback novel, you can cut off one of the side panels of the bag so that it won’t end up too long. If you’re covering a textbook, that may not be necessary, and if you’re covering a binder, it definitely won’t be necessary.
3. Lay the paper bag with the side that you’ll want to be inside facing up, and lay your book centered perfectly between the top and bottom of your paper bag.
4. Fold the top and bottom edges of the brown paper bag to the inside, so that the bag extends out only very slightly from the top and bottom of your book.
 5. Place your book so that the book’s spine is centered exactly between the left and right ends of the paper bag, and crease the bag on each side where the book cover ends.
6. One at a time, slip the ends of the paper bag over the book’s covers. The folded-down top and bottom edges act like a sleeve that will hold the cover onto your book. The fit should be very snug.
7. The brown paper can now be decorated however you want.
Brown paper bags aren’t the only materials you can use. Depending on the size of your book, you could also try large-format Strathmore papers, rolls of newspaper or butcher paper, wrapping paper, large gift bags, etc.


Yes, that brings back lots of memories! I showed my kids how to do it when they were in elementary school, too. We also experimented with recycled wrapping paper, and the paper that flower bouquets come wrapped in. My girls are all very artistic and we did lots of crafting when they were young – this makes such a difference when they are older! Homemade cards, handmade clothes and gifts, creative school projects – are all things they love to do now.
Really cool, I really like DIY ideas. We’ve learned a huge amount from doing my own Do-it-yourself projects over the years, plus I saved a bunch of cash also : )
Pingback: Crafting a Green World » Blog Archive » D.I.Y. School Supplies: A Round-up of Five Crafty Tutorials
Pingback: D.I.Y. School Supplies: A Round-up of Five Crafty Tutorials
Pingback: Tutorial: The Classic Newspaper Hat, Now with Your Choice of Paper! – Crafting a Green World
Pingback: Tutorial: The Classic Newspaper Hat, Now with Your Choice of Paper!