by Jennifer Tuohy
Wondering what to do with your old bathroom cabinet or vanity? Turn it into a pint-sized DIY kid art table!
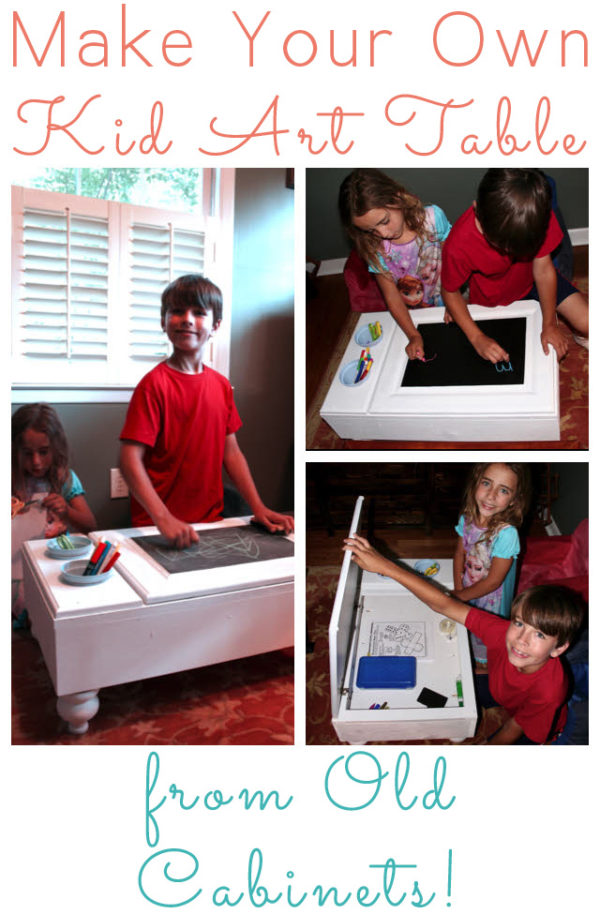
We recently remodeled our upstairs bathroom and decided to reuse an old cabinet we had in there as a DIY kid art table for our two children. This is quite a labor-intensive project and cost about $60 in supplies, but considering this style of art table runs upwards of $200 brand new, it seemed like time and money well spent—especially as we were able to feel good about putting parts of the old cabinet to good use.
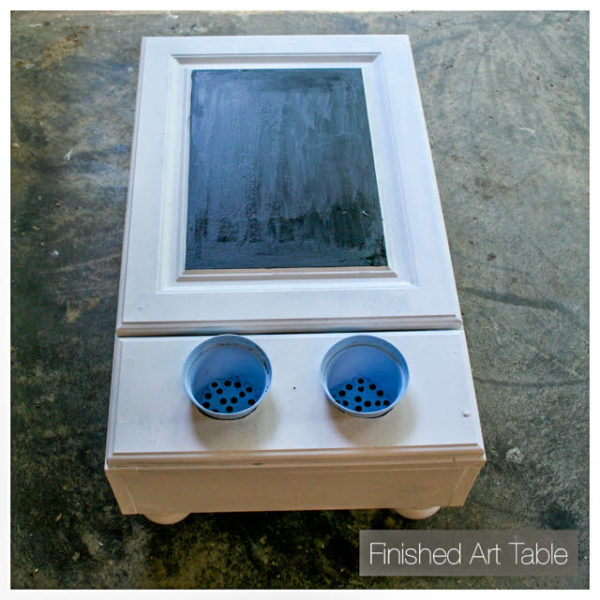
The finished product has a chalkboard surface for doodling, two pots for keeping pens, chalk and crayons at hand and a very useful storage compartment to stash all those other art supplies.
DIY Kid Art Table
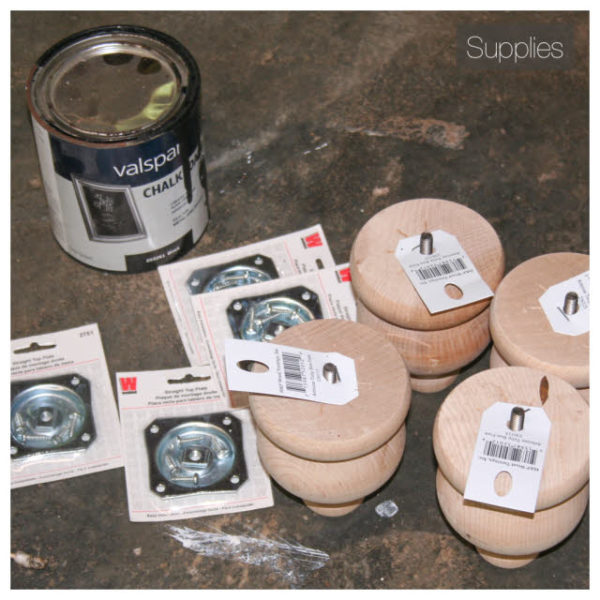 Project Supplies:
- 1 cabinet
- 4 wooden cabinet “feet”
- 4 plates for attaching the feet
- A can of chalkboard paint
- 2 pots for the art supplies
- 1” x 6’ pine board
- 2 small plastic plant pots
- 1 sheet ¾” Plywood
- 1 and ¼” screws
- White satin interior paint (or any other color you’d like!)
- Chalkboard paint
Project Tools:
- Drill
- Jig
- Sand paper
- Jig saw
- Paintbrush
- Spray paint
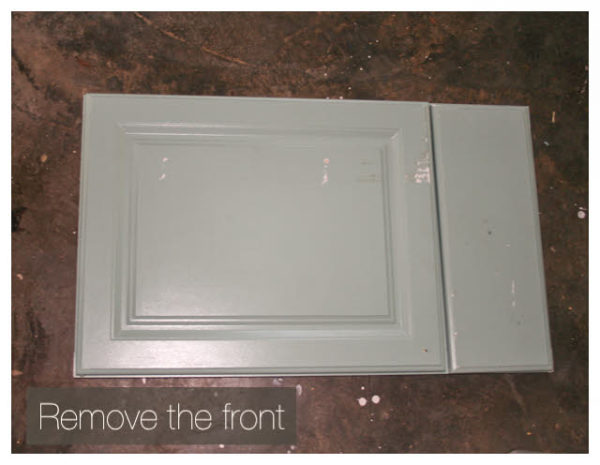
Step One: Dismantle Your Cabinet
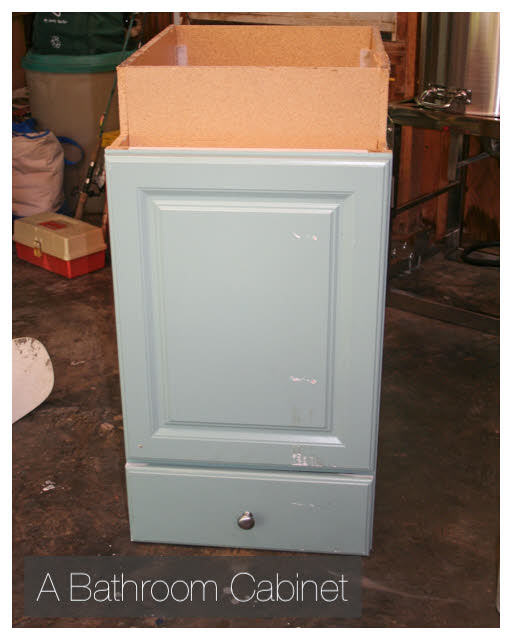
Here’s the old cabinet we took out of the bathroom. The first thing we did was remove the cabinet front from the base, take the drawer out and then demolish the rest of the cabinet with a mallet. We were left with only the frame of the cabinet face, the door and the front face of the drawer.
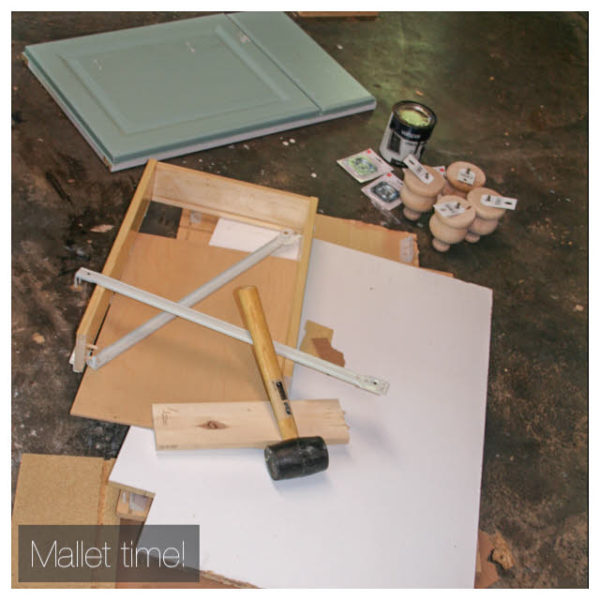
Tip: You can set aside the back panel of the cabinet to use as the base of the art table. Ours was a composite material and had some water damage, so we decided to go with a new piece of plywood for more strength.
Step Two: Unscrew the Door and Create a Base
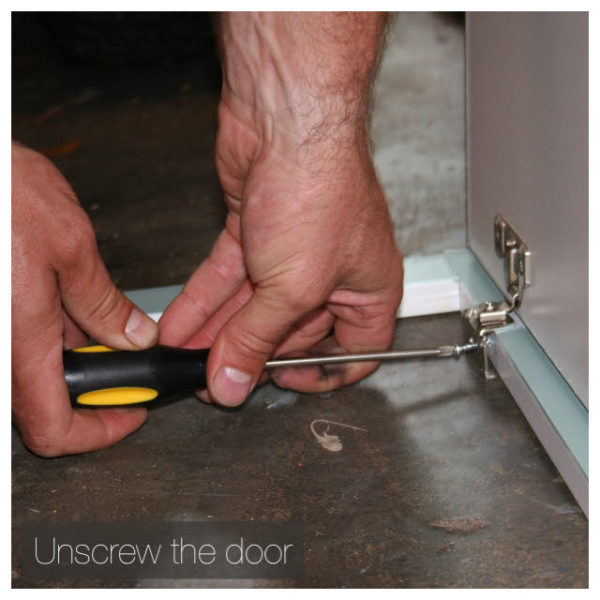
Next, we unscrewed the door from the frame. Then we measured the face of the cabinet and cut the 1 x 6 board into four pieces that would fit all four sides of the face.
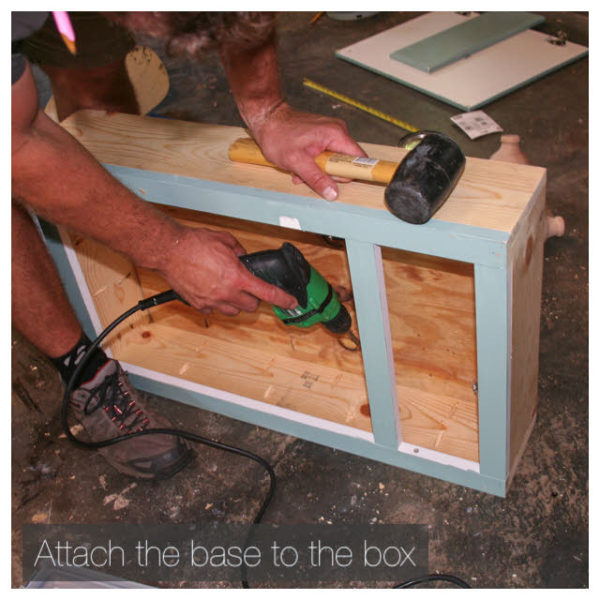
Step Three: Create a Box
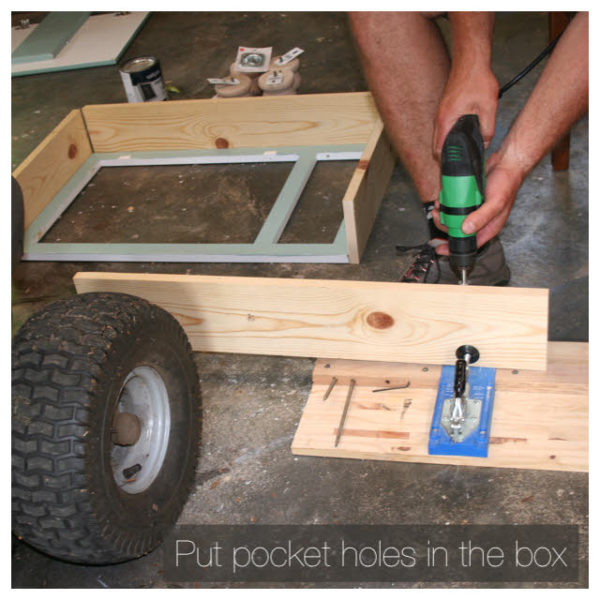
Using a jig to create pocket holes in each piece of wood, we built a box to be the base of the art table and then attached it to the face using one and ¼-inch screws.
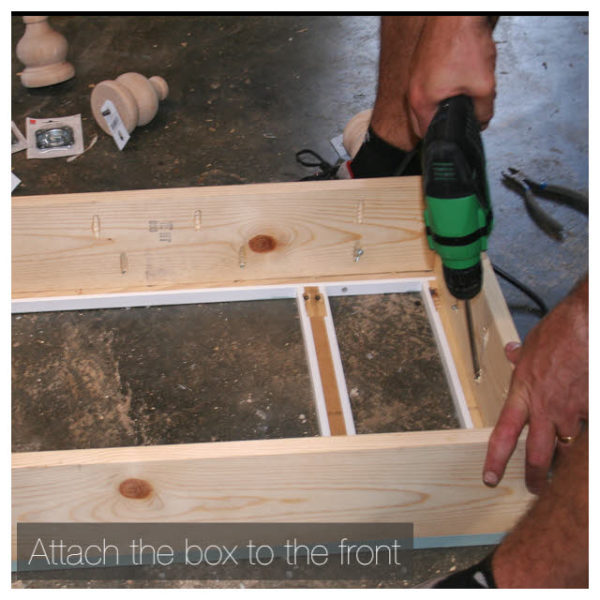
We cut the plywood to fit inside the box. We added more pocket holes in the plywood so we could secure it inside the box to become the base of the table.
Step Four: Add Feet and Attach the Door
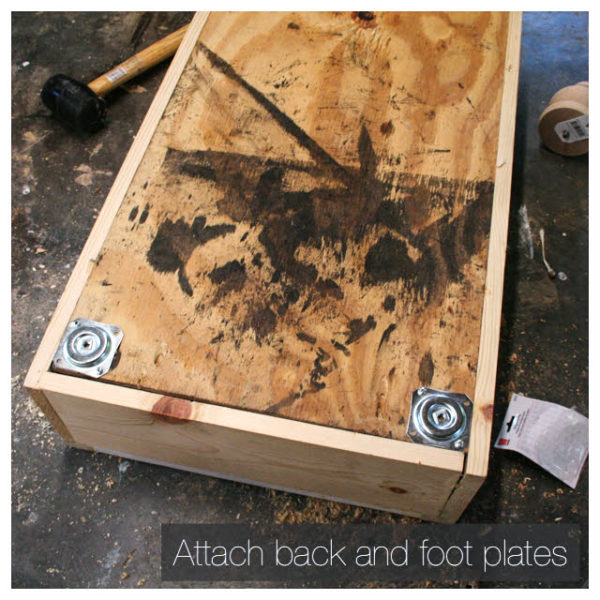
Once we had the box together we attached the plates for the feet to each corner of the table, using the screws that came with them, and bolted the feet on. We then filled in any gaps in the frame with wood putty and sanded it all down.
We re-attached the door and, using a drill with a router attachment, created inset screw holes in the face of the drawer to attach it to the frame. We then covered the screws up with wood putty.
Step Five: Add Supply Holders
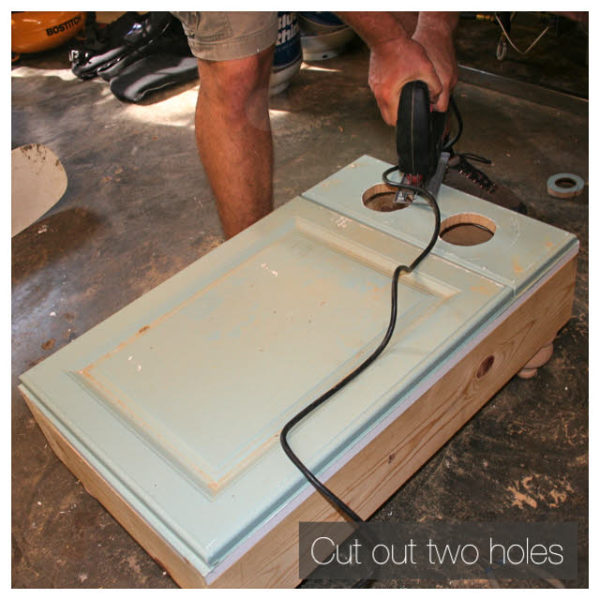
Once the drawer face was on, we placed the flower pots we were using as pen and crayon holders onto the drawer face and traced around them. We drilled a hole to start the circle and used a jig saw to make the hole larger, cutting around the line we’d drawn.
Step Six: Paint

Finally, we applied two coats of white satin interior paint, added chalkboard paint to the raised face and spray painted the plastic flower pots blue. I also attached some rubber stoppers between the frame and the door, to prevent little fingers from getting trapped.
The children are thrilled with their DIY kid art table. They love being able to draw right on to it, and they really enjoy organizing their supplies in the storage compartment and playing “school” with the table. Plus, because we can easily put any clutter into the storage compartment, it looks nice enough to have in our sitting room—definitely nicer than it looked when it was in our bathroom! When it’s time to decide on a new bathroom cabinet, follow these steps to turn your old cabinet from trash to treasure.
Jennifer Tuohy enjoys turning something old into something new and useful. She writes about her DIY upcycling projects for The Home Depot from her home in Charleston, South Carolina.
DIY kid art table tutorial republished with permission from Sustainablog.


Good looking art table! I love it!