

Toys are fun for any kid, but half the fun of unfinished wooden toys is, I discovered, letting my kiddos paint and finish them all by themselves.

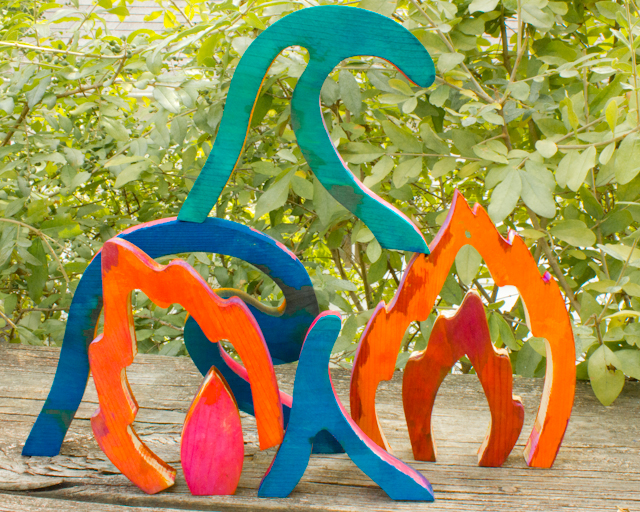
These wooden toys from Clickety Clack are hand-cut from pine and left unfinished. I purchased a fire stacker and a water stacker for my six-year-old and eight-year-old, quite taken by the idea that my kiddos could take ownership of the manufacture of their own toys by painting and sealing these stackers themselves.
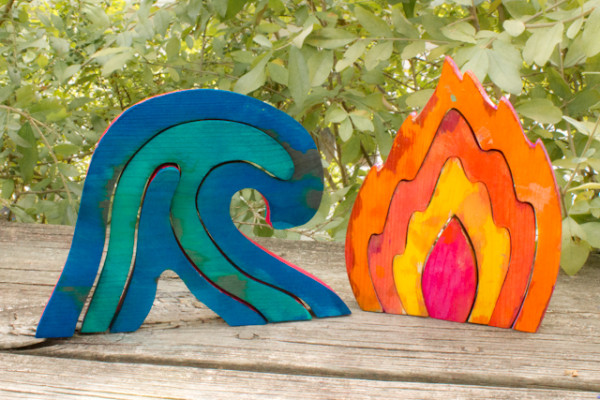
To paint the stackers, the girls used conventional store-bought non-toxic liquid watercolors, and painted the colors right on with a soft paintbrush. The unfinished wood soaks up the color and slightly spreads it, similar to the effect that watercolor paint gives on good-quality watercolor paper. Although in my tutorial on dyeing unfinished wood with liquid watercolors I recommend putting the wood and watercolor paint into an airtight baggie to dye it with minimum fuss and effort, for an object this large, not to mention a toy made by and for a child, a paintbrush is the way to go, since you’ll be able to be so much more creative that way.
After painting, we let the watercolors dry completely. If your child still mouths objects, you’ll want to set the watercolors by briefly soaking each piece in vinegar, because some watercolors, depending on color and brand, will bleed even through sealant if they’re stuck in a kid’s mouth; since my kids, some of the naughtiest ever invented, at least don’t still stick stuff in their mouths, we skipped that step.
When their stackers were completely dry, I gave my kiddos the jar of my homemade beeswax wood polish and set them to work rubbing the polish right into the unfinished pine. Since the polish is completely natural, the kids used their hands to rub it in, and I tried to get them to do our living room table, too, but they didn’t fall for it this time.
As soon as the polishing is finished (and the kids have washed their hands and put away the jar), the toys are ready for play! Of course, I’m also fond of the simple palette of plain unfinished wood, and my kiddos have a large collection of unfinished wood blocks of all size and provenance that fuel their creative play, but it’s the wooden blocks that they’ve personalized, from the scenes painted in acrylic paint to the abstracts dyed with watercolor, that are really special to all of us, and that will one day make, I hope, my daughters’ favorite heirlooms to hand down to their own children.


Will soaking the painted toy in vinegar change the color or make it bleed?
Just found your blog-Your tutorials are awesome!
The dye may bleed into the vinegar, but that’s only because it’s excess dye; vinegar will also help the dye set. Mind you, I’ve never had a problem with the color bleeding off my my wooden toys, but I do know one person who had a bleeding problem with one particular color of blue that she was using, and vinegar sorted out the problem.
Pingback: Crafting a Green World | How-to: DIY Liquid Watercolors from Upcycled Dried-Out Markers | Page: 1 | Crafting a Green World