

I love the new smash books from K and Company. They are such fun to work with. The different themes and papers are gorgeous, and I love that each page is a surprise. I got one of these books to document my journey in 2011 and have been hard at work filling that journal up. This year I wanted to make an upcycled smash book, rather than buy one that uses all new materials. Here’s how you can make your own!
What is a Smash Book?
Smash Books are basically pre-bound scrapbooks, but instead of plain pages, which can be daunting to fill, they have patterned papers and papers with sayings on them. The books are made from good quality card stock and can take a lot of memorabilia glued, taped or stapled to the pages.
The entire process of just adding pictures and memorabilia to the pages without bothering about the perfect layout and look is what is called ‘smashing.’ This makes these new smash books fun and easy to work with. The pages are beautifully coordinated and put together with an occasional ‘surprise’ page with a saying or picture that you would not expect. The books are coordinated with a lot of extras that you can buy as well, like pockets, stickers, and tabs.
Upcycled Smash Book Materials
Before you get started, you want to identify what you love about current smash books and set out to mimic that look using only upcycled materials. Sounds like a challenge, right? It is, but the results will be so fantastic that you won’t believe that all of these items were destined for the trash can.

Let’s start with what I love about the smash books:
- The pages are all different and yet seem to come together because of an overall theme and color palette.
- They always contain a few unexpected pages, with big bold typography or a cute quote.
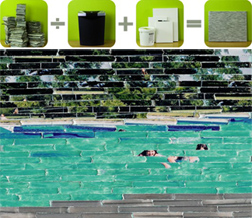
That is the look I want to mimic in my upcycled smash book. I love use upcycled materials in my projects, so I have a big box that is home to soda cans, plastic packaging, old books, old children’s picture books, interesting magazines and mailers…you name it, and I probably have it in my treasure chest. Here are a few ideas for upcycled materials that you can use in your smash book:
- Catalogs and mailers. Junk mail catalogs just go in the bin after you’ve perused them. Instead, you can use mailers or pages from catalogues to make very interesting smash book pages!
- Art experiments gone bad. Prints I wasn’t crazy about from a print-making class will find their way into my upcycled smash book and will make awesome textured backgrounds.
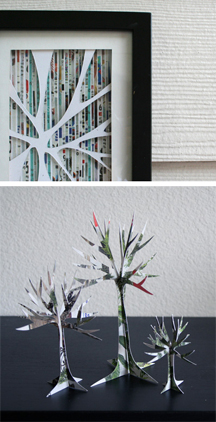
- Old photographs. I love to take photographs and get a lot of my work printed in large sizes. Sometimes I end up framing the prints and other times they just make their way into my craft stash. Some of these photographs make really cool pages. I especially like the print shown above for use in my smash book. I cut the larger picture in two and used it to make one two page layout.
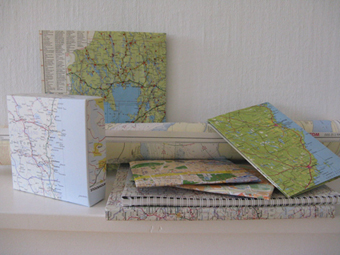
- Wedding invites or fun shaped cards. You can always add a layer of gesso or make a collage. They also work well as smaller pages, pockets, or inserts to add visual interest to the book. What I love about making my own smash book is that I can incorporate a lot of different paper with different colours and textures. I can also choose to add pockets and customize the folio to my needs.
- Raid your stash. I also have some papers in my scrapbooking stash that will work well.
- Reclaimed cardboard. This is for the cover.
You will also need:
- Glue. You’ll want to use mod podge or a glue stick to smash your pages.
- Scissors. If you have other specialty paper cutting tools, like a die cutter or punches, you can use those on your smash book, too!
Now it’s time to dig into your stash and make that smash book. Plan to have about 40 pages in your book. That is the size the actual smash books are too.
How to Make Your Smash Book
1. Gather all the images you plan to use and cut pages out of them. I used a slightly smaller size than typical smash books, but you can pick any size you are comfortable working with. My only advice would be to keep it smaller than an A4 size to make sure the pages are sturdy enough to withstand all sorts of smashing.

2. Punch your pages and bind them. Use a hole punch and 3 book rings to bind the book. Punch the holes on your first page, then stack your second page behind and use those first holes as guides to punch the next ones. This method will make sure your book ends up stacking evenly. Once the holes are punched, you can clip on the book rings to secure everything in place. What I love about using the book rings is that I can always go and add more pages if I feel I need to. There is a lot of room to play and experiment, add and subtract.
3. Make your cover. Cut out a cover that’s the same size as your pages out of your reclaimed cardboard and punch holes that match the holes on your pages. Then, you’re ready to decorate your cover. I covered the cover pieces in an old photograph print that had gotten creased and could not be used for anything else. The crease was very easy to conceal while covering the book.
4. Get smashing! The smash book is now ready for all your adventures and lots of smashing What are you going to document in your smash book?
I decided to use it to document my journey through 2012, so the first page I made in my book had highlights from an awesome day where I just generally felt blessed and happy. The feeling was something I wanted to remember since I had been pretty tired lately and a little overwhelmed with massive to-do lists both at home and work. This felt like the perfect way to start my upcycled smash book. You can see what my first page looks like at the top of this post!
Making this page was quite a smashing experience. Have an artsy day y’all! Hope you enjoyed this upcycling adventure 🙂
[All images courtesy of Mahe Zehra Husain]


Pingback: Project Show-and-Tell: An Upcycled Smash Book for My Anniversary
This is awesome! Now I know how to craft a scrapbook /smash book for myself in a way that appeals to my green and arty crafty sides. Chomping at the bit to get started now!
I’m so glad you liked the post Nancy! Do send pictures of your book at thecraftycan@gmail.com. I would love to see what you come up with 🙂
I have been doing mixed media art and altered books for several years and had not heard of a Smash Book. I think this is a fairly new term though (?) I love them! I am ready to start one of my own. Thanks for the info!
Yup Smash Books are new products that have been developed by EK Success. I can’t wait to hear how your smash experiment goes! 🙂
I enjoyed your take on smashbooks/junk journals 🙂 I had heard the “new terminology” …it was common to do the old style scrapbook that way. It always depended on the person how much they added decoration of course.
I haven’t done any smash books of recent but you inspired me! Ithink I’d like to make a smash journal focused on the creative process involved as I create ATC’s…I think it could be really cool!!
I think that would be awesome Nancy. Could you please share pictures at thecraftycan@gmail.com. I would LOVE to see what you do!
Mahe
If smash journaling is new around the world, you can imagine in Argentina? I´m more than ready to craft my own. I´m too messy and impatient for scrapbooking 🙂 Love your blog!!!! cheers