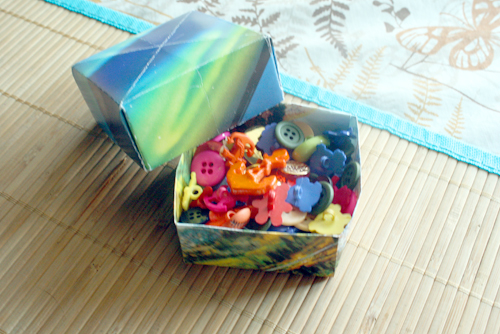
 Even if you don’t use a paper calendar in your day to day, chances are you have an old one laying around towards the beginning of January. When I was visiting my mom a few weeks ago, she got a promotional calendar in the mail from a real estate agent. She doesn’t use paper calendars, so rather than let all of that paper go to the bin, I snagged it to craft with.
This origami box tutorial requires no glue and no tape. All that you need is a calendar, a ruler, and a pair of scissors!
1. To start, cut out two pages from your calendar. Then, you’ll need to trim one page so that it’s 1/2″ narrower than the other. The narrower page is going to be the bottom of your box.
2. Since calendar pages aren’t typically square, you’re going to need to make squares. Easy peasy! Place the larger page so that it’s vertically aligned on the table in front of you, grab the top left corner, and fold it down to the right. Then, just cut along the edge. When you unfold, you’ll have a nice square.
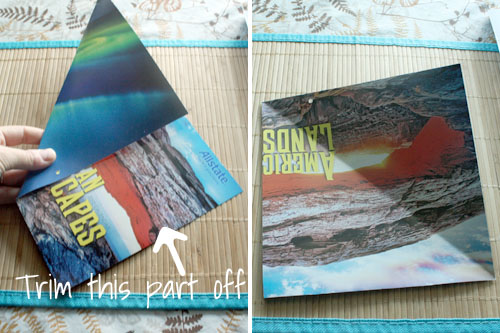
3. Place that same piece of paper right side down on the table, and then fold your square in half, so you have a rectangle, like this:
4. Open it back up, rotate the square 90 degrees, and repeat. The folds should form a + sign on the square.
5. Open your square back up again, and make sure the right side is still down. Now, grab each corner and fold it into the center. You’re going to make 4 folds, and you’ll have a new square that looks like this when you’re done:
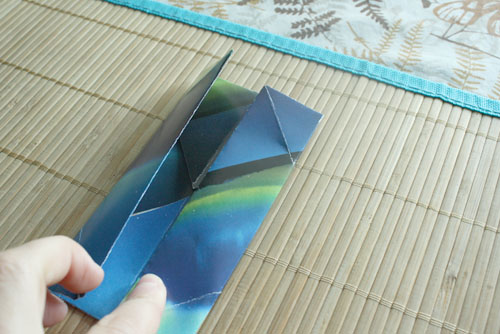
6. Now, take the top of the new square, and fold it into the center. Do the same with the bottom half, so your paper looks like this:
8. Now, open your square up again, rotate the paper 90 degrees, and repeat step 3. When you open it up again, your paper will look like this:
9. See how you have a square with 4 triangles inside of it? Choose one triangle, grab the corner that’s in the center of the square, and unfold it. Do the same with the triangle that’s across from the one you opened.
10. Fold up the edges of the still folded triangles along the crease that’s running down them:
11. OK, this is the sort of tricky part. With the sides still up, you’re going to pinch in along the folds at the top of your box (near one of the unfolded triangles). When you pinch in, that unfolded triangle will want to come up off of the table:
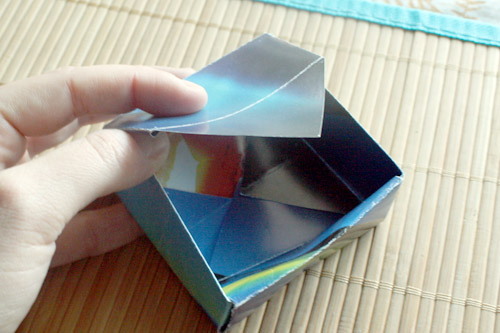
12. The thing about origami, is that those creases that you folded and unfolded at the beginning, called “guiding folds,” are really aptly named. The paper is going to want to do the right thing, so be gentle, and listen to what it wants to do. Nudge that unfolded triangle forward. You want to fold it down and over the side you created, then tuck it back in to complete that side of your box. Here’s the triangle folding over:
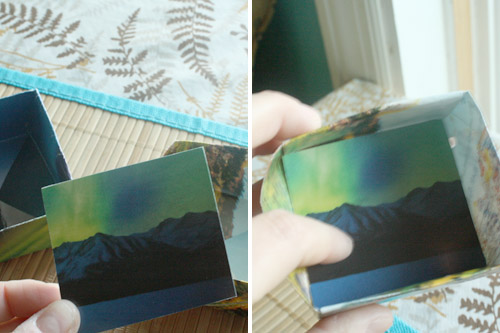
13. And here’s the completed top half of your box, with the sides all tucked in:
14. Repeat steps 2-13 with your smaller piece of paper to make the bottom of the box. Then, measure the box size, and cut a square of paper from the scraps you created, and fit the square into the bottom of the box like so:
If you’ve got a 12 month calendar, you can make 6 treat boxes using this origami box tutorial. That’s a lot of little storage container that are totally free, and it keeps that paper out of the landfill! Win-win!












Oohhh I like this. Pretty sure I have some old calendars laying around too. I used to be so into origami.
Awesome! I know how you feel I used to have a paper crane obsession and really fell out of the folding habit.
Pingback: 10 Ways to Upcycle Maps!
Just did this with my granddaughters and we had lots of fun. A nice addition is to make a coffee filter flower to go on top, really classy!:-) Thanks!
Pingback: Crafting a Green World | The home for green crafts and tutorials!
Pingback: Living Arts Weekly: Mothering – LifeWays
Not sure if you are still monitoring this page. Not sure which edge of a calendar page to cut the half inch from. I’m wondering if I should cut the half inch off one page AFTER I make it square? Thank you.