
 I like to make educational toys for my girls–matching games from their artwork, file folder games, extension activities for the books they read, anything that will allow them to incorporate what I want them to learn into the pleasures of their lives.
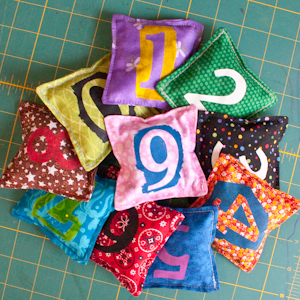
These particular bean bags were inspired by my three-year-old, who hasn’t yet memorized her numbers. Sure, she can count on her fingers and plays a mean game of Uncle Wiggily, but sit down long enough to figure out the difference between a 5 and a 9? Eh. Why not just call everything an 8?
The beauty of the stenciling, however, is that you can put anything that you want on these bean bags–kids’ names, states and capitals, letters (I really want to make this alphabet bean bag set), or instructions for the craziest Game Night game ever! Here’s how to make them:
You will need:
- fabric scraps measuring at least 4.5″ square. I used quilting cotton, but canvas, upholstery remnants, felt, and even vinyl would work, although you might need to modify your stenciling method with a different fabric
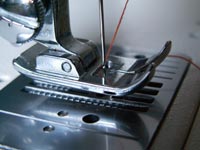
- sewing machine with a medium-weight universal needle and matching thread. I top-stitched around these puppies twice to make them secure, so I’d advise a thread that will blend, not fetchingly contrast, with your fabric here.
- dried beans. I used pinto beans, which were the cheapest, and used about three pounds of dried beans for 30 bean bags. Any dried legumes, rice, or even cherry pits would also work.
- freezer paper, sponge brush, and professional-quality fabric paint for freezer paper stenciling
 1. Cut out two squares of 4.5″ fabric for each bean bag that you want to make.
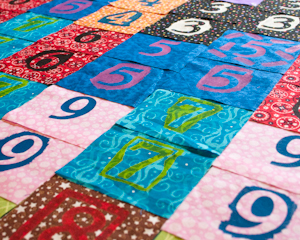
2. It’s easy to paint the stencils on your fabric before you sew it together. I used my Cricut to cut the stencils directly into my freezer paper, and I stenciled the positive image of each number on one side and the negative image on the other side. If you haven’t tried freezer paper stenciling before, it’s easy–check out my freezer paper stencil tutorial for more tips and tricks.
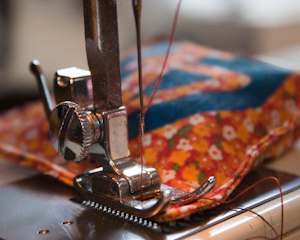
3. Making sure that the stenciled images on each fabric square are aligned in the same direction, face the two sides of each bean bag together and sew around 3 and one-half sides–you’re going to leave yourself an opening half of one side long for stuffing your bean bag.
 4. Clip the corners of each bean bag to reduce bulk, then turn them right side out, using a chopstick or dull pencil to push the corners out nice and sharp.
5. Top-stitch twice around three sides of each bean bag–don’t top-stitch around the side that has the opening, because you’ll do that one after the bean bag is stuffed.
6. Fill each bean bag with dried beans. I like mine nice and stuffed, but in order to top-stitch easily and neatly close your opening, leave a least an inch’s room at the top.
7. Top-stitch the side with the opening twice. This will neatly close the opening and give that side the same sturdiness as the other sides, while allowing it to match, as well.
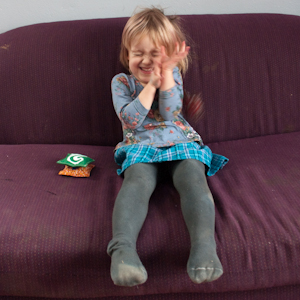 Now they’re ready for tossing!


Those are so cute! I love the stenciled look. Thanks so much, I’ll be linking.
I am going to make a set of these for my son’s birthday. He is obsessed with numbers!
I love your blog! The bean bags look so cute! Both of my son’s grandmas have been looking for something crafty/useful to make him and I think I’m going to suggest these.
Love it. I am making some right now…but I am using transfer paper just because I had some and need to use it up. Making numbers on the computer in different colors and printing them out. Plus, recycling some old pants and shirts for the fabric. Such a versatile project!
Hi,
I am one of the Editors for the crafting and DIY website FaveCrafts.com and our blog FaveCraftsBlog.com. We offer hundreds of free craft projects, tutorials, home décor ideas and more in every area of crafting.
I came across your blog and I like these stenciled bean bags. I would like to invite you to contribute this craft project to FaveCrafts. All the details of your authorship are preserved. We love to feature fresh voices on our website constantly and nurture such a vibrant, creative community of crafters.
In addition to publishing Guest Features at our website (with over 1 million page views per week and over 200,000 page views per day) and blog, we promote these items in our bi-weekly newsletter, which currently has over 600,000 email subscribers.
If you are not interested in contributing to our website or blog, we hope you will consider a reciprocal link with FaveCrafts.com. We wish to develop a quality network of crafters and crafting writers for all our readers.
Thank you for your consideration,
Christine
Editor
http://www.FaveCrafts.com
http://www.FaveCraftsBlog.com
great! You did a good job!
Neat idea! My grandkids always play catch and this might suit them well especially with the doublestitching. This is a complete walkthrough. Thanks for spending time to write
Pingback: Remake a Child’s Shirt into a Birthday Shirt with Freezer Paper Stenciling : Crafting a Green World
Pingback: Remake a Child’s Shirt into a Birthday Shirt with Freezer Paper Stenciling
I should mention that you want to fold the raw edges of that fourth side to the inside before you top-stitch it closed. That will hide the raw edges and make the fourth side match the other three.
Pingback: Crafting a Green World | Handmade Memory Games Crafted from Sustainable Supplies | Crafting a Green World
Pingback: Crafting a Green World | The home for green crafts and tutorials!