
 Um, you’ve probably gotten the idea by now that I like to craft with felted wool sweaters, right? The twenty-pound cardboard box on my study floor full of cut-up wool sweaters tells me that this is true. And you’ve probably also figured out that I prefer to use acrylic felt made from recycled plastic over conventional wool felt (and you don’t agree–I swear, that Wool Comes from Sheep post is the only one I have ever seen on all of Green Options in which a commentor calls a blogger a Bad Name. A Bad Name! Really? Because of crafting? I sort of left the world of academics in favor of crafting to avoid crazy politics, but anyway…).
Ahem. My point, now that I’ve gotten around to it, is that I actually do craft with new wool, but I need to know where that wool has come from so that I can assure myself that the sheep were humanely raised as the happy, frolicsome beasts they’re meant to be (I assume–never having raised sheep myself, they could be fierce and blood-thirsty predators, for all I really know).
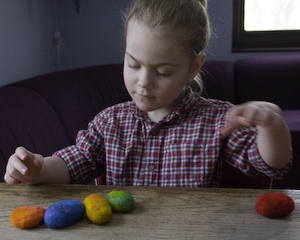
And one of the awesomest kinds of wool to craft with, especially if you’re not a spinner or a knitter, is wool roving (just don’t use superwash!). You can felt wet-felt wool roving to make your own felt, or you can welt-felt it around a form. A good project for a newbie is this one, in which we’re going to wet-felt some roving around a river rock. It will be hefty but soft, good for anything from a paperweight to a plaything:
 You will need: a river rock or two, maybe around the size of your palm or a little smaller; wool roving (ideally roving that is certified organic or bought from an independent crafter who can assure you of its humane origin); hot water; dish soap
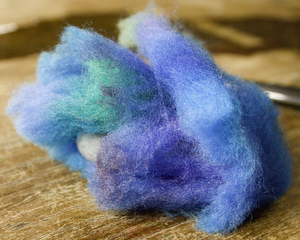
1. Roll up your rock, one thin layer at a time, in several layers of wool roving. You want to keep the individual layers very thin so that they will all felt to each other neatly, and you’ll want the strands of the wool to run in a different direction with each thin layer you apply, also to help the wool felt neatly and evenly.
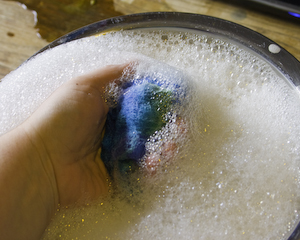
 2. Wet-felting requires heat, agitation, and a little soap, so now you need a dishpan or a sink full of hot, soapy water. The water can be less hot if you’re working with children, but it will take longer. Change your water as often as you need to keep it as hot as you’re comfortable working with.
3. Dunk your roving-covered rock carefully in the water to get the wool saturated. Some people choose to wrap their roving with pantyhose or tie it with thread to keep all the wool in place over the rock, but if you start out carefully, mostly just squeezing the roving-covered rock in your hands and rolling it around slowly between your hands, checking often to make sure you aren’t uncovering any spots of bare rock, the roving will gradually set enough that you can start to work with it much more roughly.
 4. Agitation is very important for felting the wool, so once the roving has settled around the rock pretty well, you can begin to briskly roll the rock around in your hands, roughly rub it, and generally just futz it about for a while. Some people even rub their felting on cheese graters or washboards to get it really hard. If you accidentally uncover any bare spots on your rock, pull together the roving to cover it up, pinch and twist it together, and felt it closed before you continue.
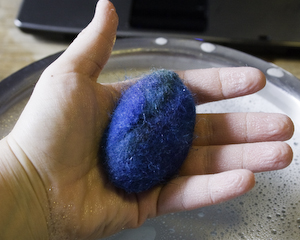
5. When you’re happy with the firmness and felting of your felted wool rock, rinse the soap out of it, squeeze it dry as well as you can, and let it sit and air dry, probably for several days.
 My girlies love themselves some felted rocks, but I like to work primarily with recycled materials, so the truly fun stuff comes when you start felting…stuff. Especially with spring approaching, old plastic Easter eggs felt well, and next time I’ll show you some other cool random stuff that held still long enough for me to felt it.


Do you read Kristin Nichol’s blog?
http://getting-stitched-on-the-farm.blogspot.com/
She’s a knitting designer who lives on a sheep farm. Beautiful work and she talks about raising sheep. Lots of baby lamb pictures every January & February!
This is one of my favorite projects, both for myself and with my kids. So fun!
Nice! My sons love to play with large rocks but my 18 month old throws them (in the house!) and I’m scared something is going to break. I think felting them would be a good safety measure.
I got this newsletter today with some cute Easter themed felted project pictures. So cute!!
http://www.beneaththerowantree.com/ROOTEDmar09.html
Pingback: thelongthread.com » Weekly Craft Roundup
Pingback: Rock Talk « Jumbleberry Jam
Hi,
WOWWWWWWW I’m so excited to start this activity. I’m teaching a fabric class for seven 6-7 year olds. I haven’t felted before. I would love to have them make caterpillars for spring with these felted rocks.
1. Where can I purchase the right amount of roving wool in the NYC or Westchester NY area at an afforadable price?
2. Where can I purchase the rocks for this project?
3. How long would it take for a child to felt the rock?
4. About how many 50 minutes sessions would it take to make @ 5 rocks per child?
5. Do you have any suggests for doing this with a group?
As you can tell, I’m beaming with excitement to get started.
Thanks
For wool roving, I’d suggest looking up farmer’s markets or local craft fairs or independent yarn/knitting shops. It can be pretty pricey, but if you’re just felting it, it goes a pretty long way. I actually buy mine either from craft fairs or from etsy–usually etsy, because I really like the rainbow colors, and etsy has a bigger selection.
For rocks, if you really need to purchase them, you can likely get them in the landscaping section at any gardening or big-box home improvement store. My girls and I tend to collect our rocks from the creek where we play–it’s not a national park or a wildlife sanctuary, so it’s okay to plunder rocks there. Homeschool groups or scouts or something might have fun incorporating a rock-gathering field trip into the project.
Once the kid understands the technique, it takes about 10 minutes to felt a rock. My four-year-old was completely unable to do this project, because she couldn’t keep the roving on. I have some ideas, though, that maybe rubber bands could be used at first to hold the roving together, or maybe the foot of a pair of pantyhose or something, or it’s possible that six-year-olds are old enough to manage it themselves.
Even though it takes about ten minutes to do a rock, you’d have to add in the time to change water a couple of times to make it hot again, and to cover each rock with the roving, and just some general futz time, so it might take two sessions of 50 minutes for a kid to make five rocks. And remember that they have to dry out for a LONG time–our rocks don’t really feel bone-dry to me for about a week, although we haven’t had a good consistent sunny spot for a while now.
I think this would be a fun project for a group. Pre-cutting the roving might be a good idea, and depending on the kids you might even need an adult to help with the wrapping it on to make sure that it’s nice and thick and all the rock is covered. As long as you’re not a perfectionist it is a pretty idiot-proof project–the roving will felt eventually, and it will felt around the rock, and whether or not you’ve got a couple of bald spots or uneven bits probably won’t matter to most six-year-olds.
Honey, I know you mean well, but next time you write, have a friend proof-read it before delivery. Watch your syntax, continuity of thought, and if you need a word you don;t know, try a dictionary or book of synonyms. Keep at it!
Are you serious?