
I know, I know. Every kid in America is having a Minecraft birthday party this year. And if you’re having a Minecraft birthday party, then I’ll just tell you right now that you HAVE to have a Creeper pinata as part of your Minecraft party games.
If you don’t understand why a Creeper makes for a perfect pinata, go ask a kid what happens when you get too close to a Creeper. Go on. I’ll wait.
See? PERFECT for a pinata.
My kids and I made this Creeper pinata entirely out of upcycled materials. In fact, my nine- and eleven-year-olds did almost all of the work to make this pinata entirely by themselves–now THAT’S a party win!
Here’s what we used:
cardboard boxes. You’ll need three–a larger rectangular box for the Creeper’s torso, a cube for the Creeper’s head, and one or two smaller rectangular boxes for the Creeper’s feet. Feel free to approximate this; you’ll notice that our particular Creeper pinata doesn’t have a cube for a head, for instance, and doesn’t have two separate boxes for the feet. Be assured that there is NO need to freak out over details–your pinata will have treats inside. ‘Nuff said.
newspaper. You’ll be tearing this into strips to cover the cardboard skeleton of your pinata.
glue. You’ll want to have both hot glue for assembling the cardboard skeleton, and either homemade pinata paste or a 1:1 mix of white glue and water for the papier mache.
paint. My kids used a combination of spray paint for the base coat and craft acrylic for the details.
string for hanging. We use kite string.
treats. I feel like there’s already enough sugar thrown at a birthday party with the cake alone, so I put in only enough candy for each kid to have about six pieces (and NO hard candy, because I can only give one kid the Heimlich Maneuver at a time), and also some non-candy treats–in this Creeper pinata there was a honey stick, a fruit leather, and a very small toy for each child, as well. Want to know the only thing that each kid wanted to eat immediately? The honey stick!
And here’s how to turn all that random stuff into a pinata!
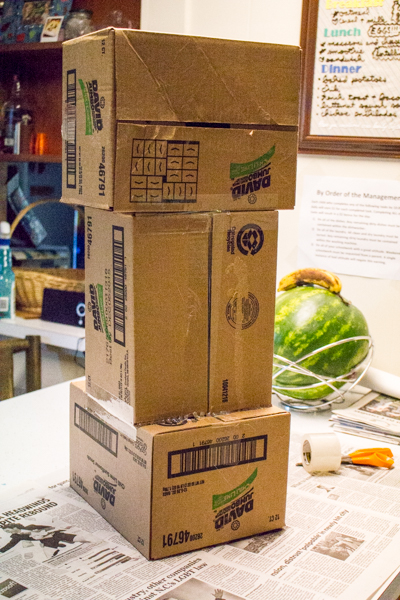
1. Assemble the cardboard skeleton. Tape the cardboard boxes shut (if you’ve really got your business together, you can trap the treats inside before you tape them shut; otherwise, join me later as I cut the completed pinata open and stuff it!), and then use hot glue to assemble the basic Creeper skeleton. Just remember these two rules of thumb: the Creeper’s head is wider than its torso, and its feet should stick out from the front AND the back. You can make the most accurate Creeper feet using two separate boxes, but we made do with one, because for Pete’s sake, it’s a child’s birthday party, not a feature film. (That’s what you say to the child when she’s lobbying for a town-wide search for a second matching box so that her Creeper can have two separate feet.)
Your cardboard skeleton should feel pretty secure after it’s glued, and remember that you’re also going to add a layer of papier mache. Nevertheless, if it’ll make you feel better, feel free to reinforce the joins between boxes with some clear packing tape.
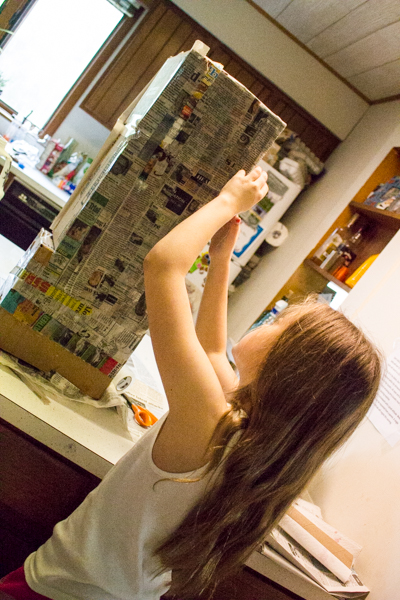
2. Papier mache the exterior. We do this for two reasons: 1) I like my pinatas to be super sturdy, because having to go four rounds to get the thing busted open is vastly more fun for the kids than having the first kid in line rip it apart on her first swing, and 2) the newspaper gives the pinata a smooth, matte undersurface that paint sticks to and looks better on, especially if you’ve reinforced any joins with packing tape.
Tear the newspaper into strips, and make up a batch of either 1:1 white glue to water or homemade papier mache paste. Dip each newspaper strip into glue, squeegee off the excess glue with your fingers, and then smooth it over the cardboard skeleton. Normally, when you’re making a papier mache sculpture, you’ll want to take care to criss-cross the newspaper strips, and to put on several layers, but on this particular pinata you just need to put on one layer to cover. Pay special attention to give good coverage to the joins between boxes, but otherwise, don’t sweat it!
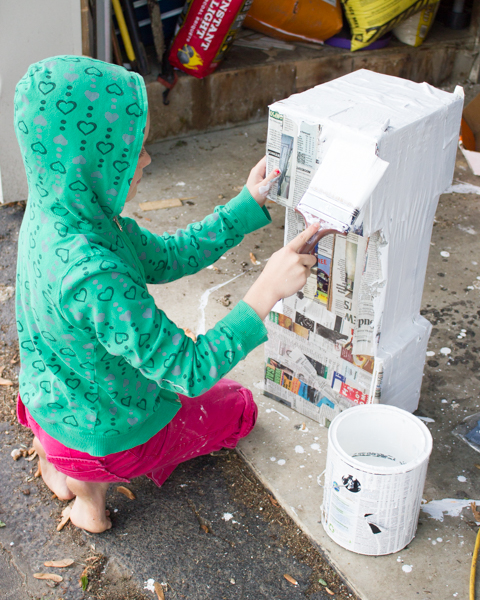
Let the papier mache layer dry completely.
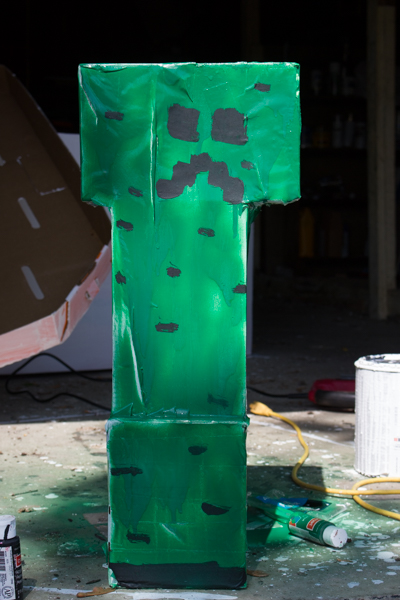
3. Paint the pinata. Prime the pinata, and then go crazy! I was a little worried that my kid was going to go for a picture-perfect rendition of a pinata, but fortunately, when given free reign, she was happy to spray paint the Creeper green, then paint on details and its face with black acrylic. Yay!
4. Stuff the pinata. I wanted to put in the hanging infrastructure after the pinata was finished, so I used this opportunity to also stuff it. Poke a hole in each side of the pinata’s head, then cut a flap in the back and string the kite string through the inside of the pinata and tie it in a knot on the top of its head. Stuff the pinata with treats, and tape the flap shut.
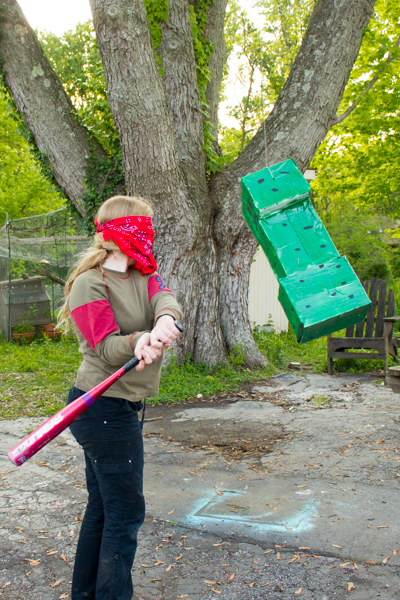
And there you go! How cute does this Creeper pinata look?
The kiddo loved it, her friends loved it, and they had a fabulous time beating it to bits with a baseball bat.


How cute. My daughter would love it!
Oh man! If only I had thought of this a few months ago! My son actually had a Minecraft birthday party!