
 Balancing butterflies have gone viral in the blog world lately, and here’s why:
They’re awesome.
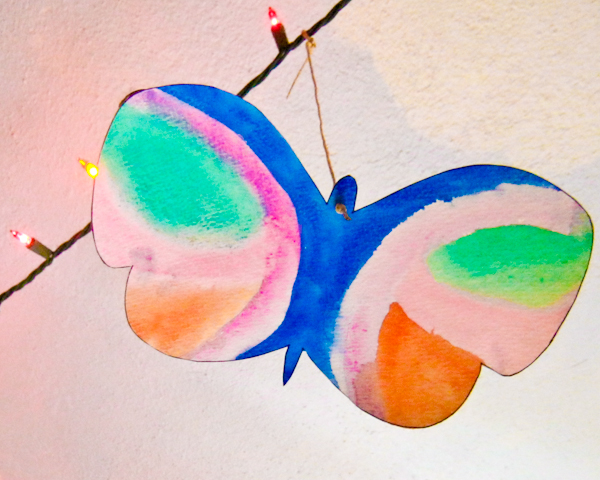
Balancing butterflies take the theory of gravity to a most playful, and least logical, end. By clever distribution of weight, a balancing butterfly will balance on the head of a pin, on the very forward tip of its head, perched amazingly like a real butterfly.
But here’s the next logical step: That clever redistribution of weight? That’s how a mobile works. Therefore, if you’ve a mind to, you can launch a whole rabble of butterflies from your ceiling, allowing them to dance in the breeze of your ceiling fan and hang intriguingly from that one magic point at the forward tip of their heads. Here’s how:
You will need:
- stiff paper. Strathmore watercolor paper (ideally used in a previous artwork?), cardboard record album covers, and cereal boxes are all appropriate thicknesses–any paper you can find of a similar thickness will work, as well.
- butterfly template. Download a balancing butterfly template from ideas4kids, or create your own by drawing any form with mirror symmetry and two wings that sweep out and forward of the center front balance point.
- two pennies for each butterfly
- slightly tacky adhesive, such as tape or a glue stick
- durable adhesive, such as hot glue or E6000
- sharp pencil
- scissors
- twine
- thumbtack
 1. Use your downloaded or created balancing butterfly template to trace and cut out your butterflies.
2. If you’re going to decorate your butterfly yourself, do so now, using any art materials that you wish, with the exception of stickers, rhinestones, etc., which would throw off the butterfly’s precise balance. If you’re using a recycled cardboard, such as a cereal box or record album cover, those are often attractive enough on their own to forgo additional decoration.
3. Use the slightly tacky adhesive to stick one penny to each forward wingtip.
4. Test the balance of your butterfly. It should be centered, at the very front of the body or close to the front, and precise–this butterfly should be able to balance on a pencil eraser if you want it to.
If you’re unhappy with your butterfly’s balance, unstick and restick the pennies until you’re satisfied.
5. Once you have the perfect placement of pennies, unstick them and restick them using durable adhesive–remember to use close to the same amount of adhesive on each penny, because the butterfly’s balance is delicate.
At this point, you could stop. The balancing butterfly makes a wonderful children’s toy or object of art in its own right. However, to create the mobile, continue:
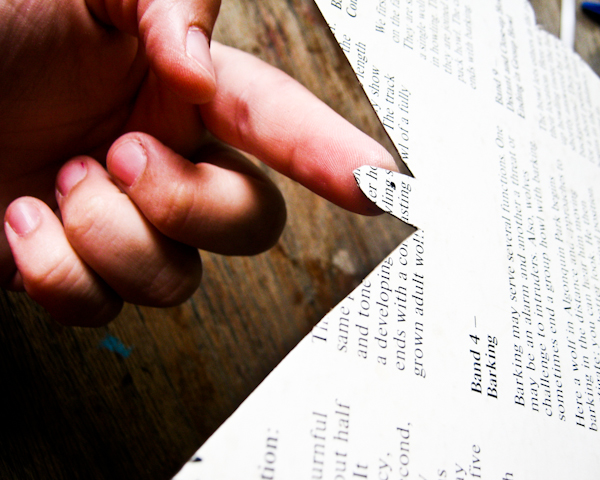 6. Using the tip of your finger, find the butterfly’s precise point of balance. Draw a small dot exactly at that point of balance.
7. Using the very sharp pencil, poke a hole in the butterfly at that point of balance. The hole should be just wide enough to thread the twine through it.
8. Thread the twine through the hole from the backside of the butterfly, and tie it into a knot on the butterfly’s front side.
9. Pin the other end of the twine to the ceiling with a thumbtack.
Your butterfly will now float, hanging face down so that you can see its decorations. It will waft delicately in the breeze, sometimes just the breeze of a door opening or a person walking across the room.
It will be beautiful.


Pingback: Crafting a Green World » Blog Archive » Five Eco-Friendly Craft Projects for Your Butterfly Lover
Pingback: Five Eco-Friendly Craft Projects for Your Butterfly Lover
Pingback: Switch Your Balancing Butterfly to a Balancing Bat for Halloween – Crafting a Green World
Pingback: Switch Your Balancing Butterfly to a Balancing Bat for Halloween