

Want to get a kid excited about math?
Play math games! Kids LOVE games and puzzles, and they’re great for cementing sophisticated concepts in growing little brains.
You can buy some pretty cool math games, sure, but as with nearly anything else, some of the best and simplest games are handmade. Here I’m going to show you how to build the upcycled cardboard number tiles that my kiddos and I use in tons of fun math games. Create them now, so that you’re ready next week when I teach you how to make an upcycled hundred grid Battleship game!
You will need:
upcycled cardboard–Choose something thicker and sturdier than cardstock; any type of recycled cardboard box will do. Using a thick cardboard will keep us from having to laminate the pieces. A handmade item isn’t very eco-friendly if it’s encased in plastic, now is it?
pencil and ruler–Very neat, very straight lines are the key to making this project useful and nice-looking.
scissors and guillotine paper cutter–Make the project even easier by using a guillotine paper cutter for some of the work.
permanent marker–If you want your tiles to look really, REALLY nice, you can stencil the numbers with paint. I use Sharpie, which doesn’t look as nice, but it does make the tiles easy to remake when some of them inevitably get lost.
Here’s how to make your number tiles:
1. Decide on sizing. My tiles are 1″ square, sized to fit perfectly in the felt hundred grid that I made for them (more on that another time!). Your tiles can be whatever size you’d like–if you make them Scrabble tile-sized, you could use them with a modded out Scrabble board.
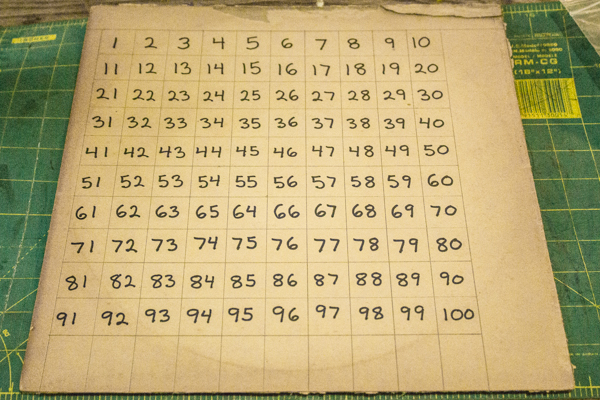
2. Draw the tiles in pencil. Using your ruler and pencil, draw a 10-by-10 grid on the cardboard, so that each square in the grid is the size that you’d like each tile to be.
3. Write the numbers. Fill in the grid with the numbers 1-100, using Sharpie, as I did, or paint and stencils, or stickers. Although I usually have my kiddos make as much of their own educational manipulatives as they can, I chose to write these numbers myself–I want them to be legible, you know?
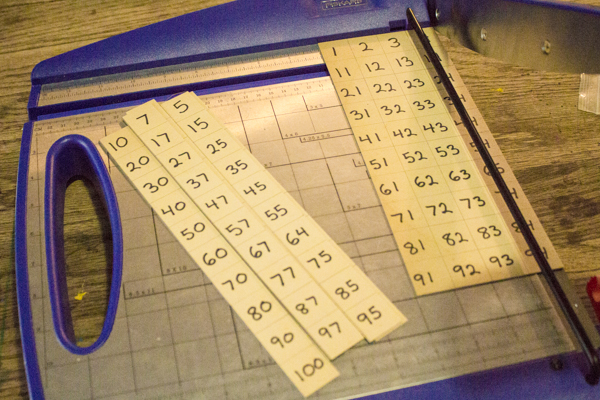
4. Cut the grid into columns, then rows. Use the guillotine paper cutter to slice each column away from the grid, then use your scissors to finish cutting out each tile.
5. Embellish, if desired. If the backs of your tiles are plain (mine have the front images of record albums on them), you could always decorate them. I used Sharpie to ink the edges of each piece, as well.
There are tons of cool math games that you can play using these upcycled cardboard number tiles, and in later posts I’ll share some more with you, but here’s a quickie game to get you started:
Hundred Grid Puzzle
- Draw a second, blank 10×10 grid on a separate piece of cardboard.
- Mix up all the 1-100 number tiles.
- Invite the kiddo to place the tiles to fill in the grid, which has exactly 100 spots. This is a surprisingly challenging activity even for a slightly older kid–you can see in the main image that my seven-year-old has actually misplaced a couple of the tiles–but it’s also self-correcting, because it will soon be obvious to the kiddo if any tiles are out of place, and then they can work their problem-solving skills to correct them, all by themselves!
To make the game easier, you can place some of the number tiles yourself, or take turns with the kiddo.
To extend the game, you can begin a pattern, such as skip counting by fours, and then invite the child to finish it.
Want to do more with number sequencing? Here are more hundred grid activities.


This is perfect! The kiddo requested Da for her math work, and so this will be a great first project for them to work on together. Simple yet educational, and like you said, with oh so many uses!
Now if I could only figure out which box I packed our cardboard and sharpies in…
I love that you packed and moved cardboard. Nothing is going to make it into the waste stream on your watch!