
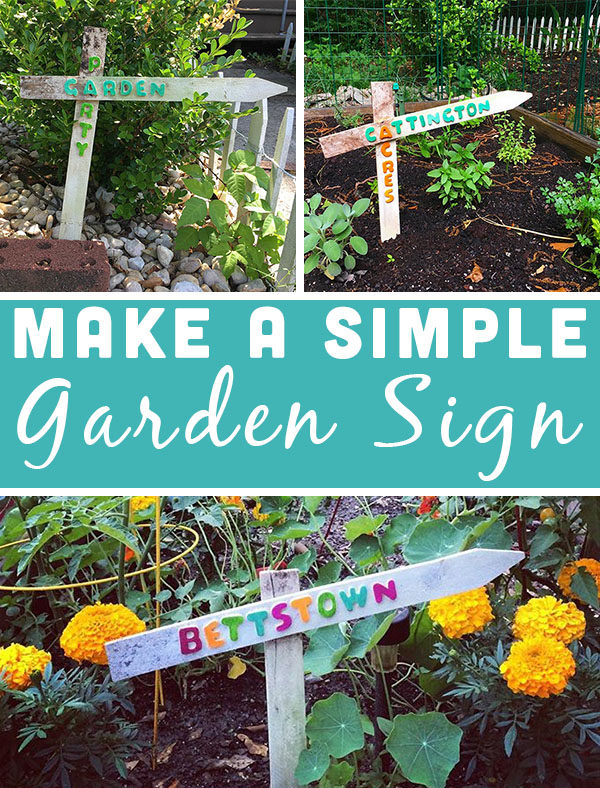
Not everything in a garden has to be functional. I love the way that cute DIY garden decorations add a pop of color and some personality to those rows of herbs and veggies. I made this DIY garden sign for a friend, and it was so much fun that I made another one. And another!
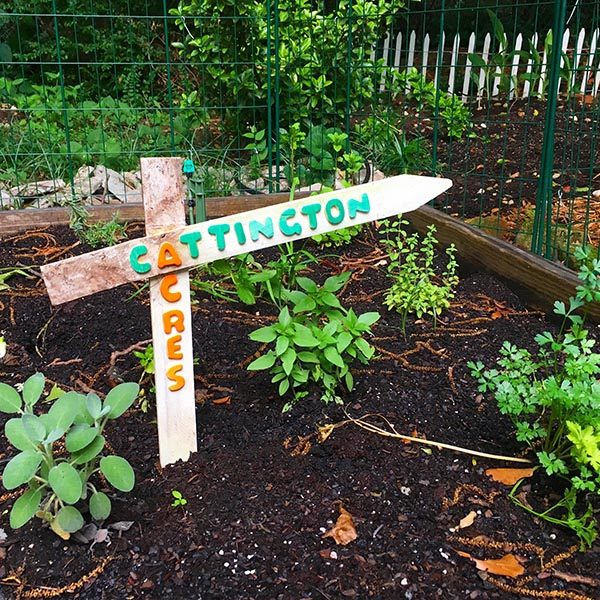
My friend Mandy is the best gardener I know. In just a handful of raised beds, she manages to yield a super impressive garden bounty for her family. Every time I visit, she sends me home with bags full of greens or herbs or beans. She’s my go-to for garden questions, and I wanted to make her a cute DIY garden sign as a thank you for always answering my random texts about the shriveling tomatoes and sad, sad basil plants in my own amateur garden.
I totally stole wooden letters from my kid’s stash to make that first sign. My son is three and just getting interested in letters. He asks how to spell things all the time, so I ordered him some wooden letters to play with. I guess I was in a hurry, because I accidentally ordered a bag of 300 letters. Seriously, there are letters all over my house. Three DIY garden signs later, there are still letters everywhere, so I don’t feel too bad about stealing from my toddler.
The wooden stakes for this DIY garden sign are leftovers from edging our rock beds. You can really use any wooden stakes you like, but it does look best if the two you choose are the same size and shape. I cleaned but didn’t paint my stakes, because I liked the weathered look of them. If you prefer a more crisp situation, feel free to paint before you start. Just let them dry completely before you get to work decorating them.
EDIT: My original garden sign held up great for about two weeks, but then a huge storm rolled in. My original tute said to use wood glue, but I’ve changed it to super glue, which should hold up better to weather.

DIY Garden Sign
Materiales
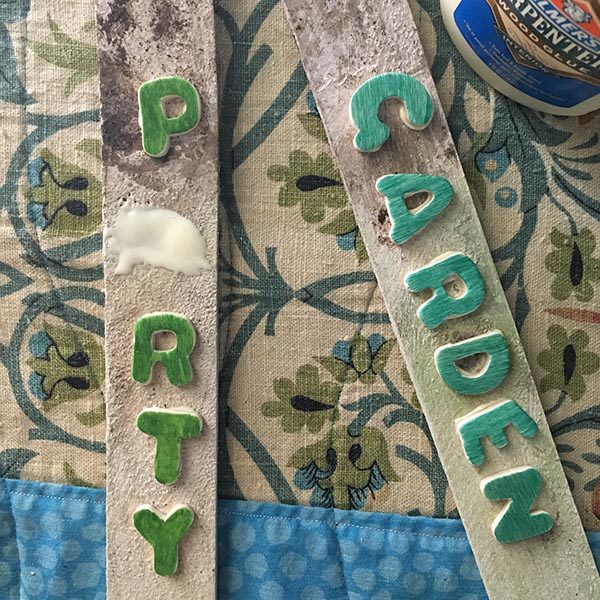
+ two small wooden stakes
+ wet rags
+ paint or permanent markers, to color the letters
+ clear coat (optional, but recommended)
Cómo llegar
1. Use your wet rags to scrub the stakes. You want to get off excess dirt and grime. Let the stakes dry completely.
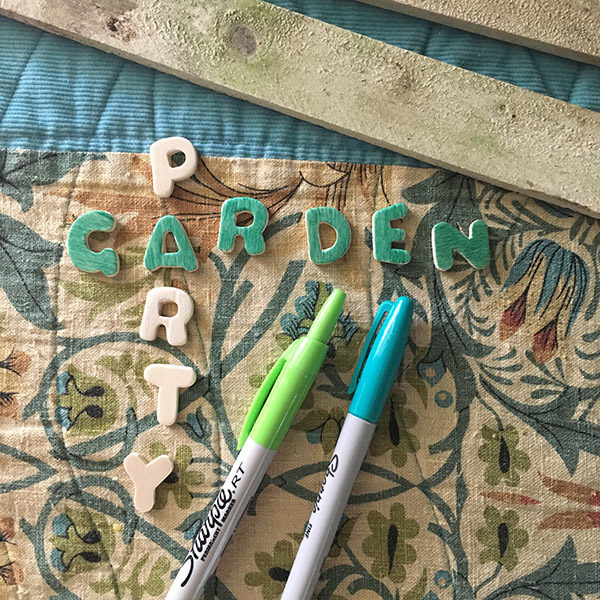
2. Color those letters! I used Sharpies to color mine, but you can also use whatever paint you have handy.
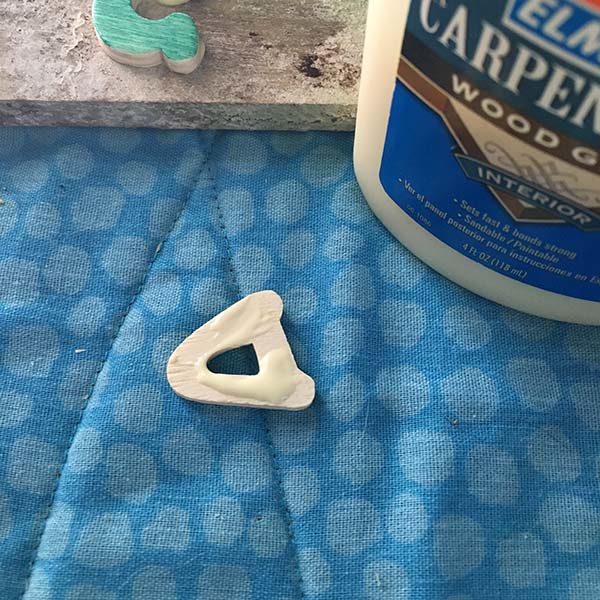
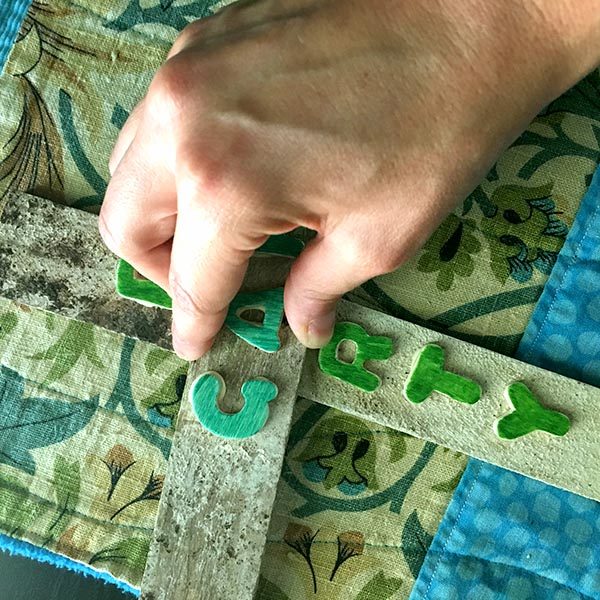
3. Lay out your words, then use the super glue to attach your letters to your stakes.
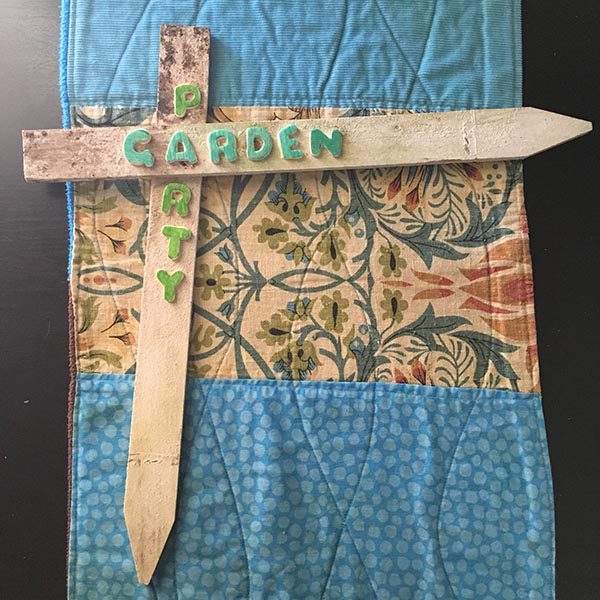
4. Glue the stakes together with the super glue, pressing firmly for 60 seconds to get a good bond. Let the super glue dry for 24 hours.
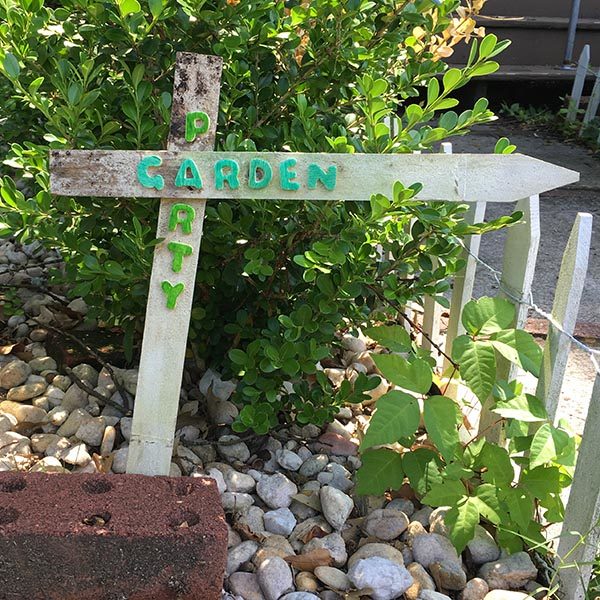
5. Spray with clear coat, and let that dry according to the package directions, and you’re ready to deck out your garden! Press the pointy bottom of the stake firmly into the dirt.


