Pro tip: If you pretend that your dinnerware aesthetic is mismatched Fiestaware, then it doesn’t matter how many dishes your kids break, because you can always just go buy another random plate and it’ll fit right in.
And bonus points for style, because broken Fiestaware is awesome for crafting!
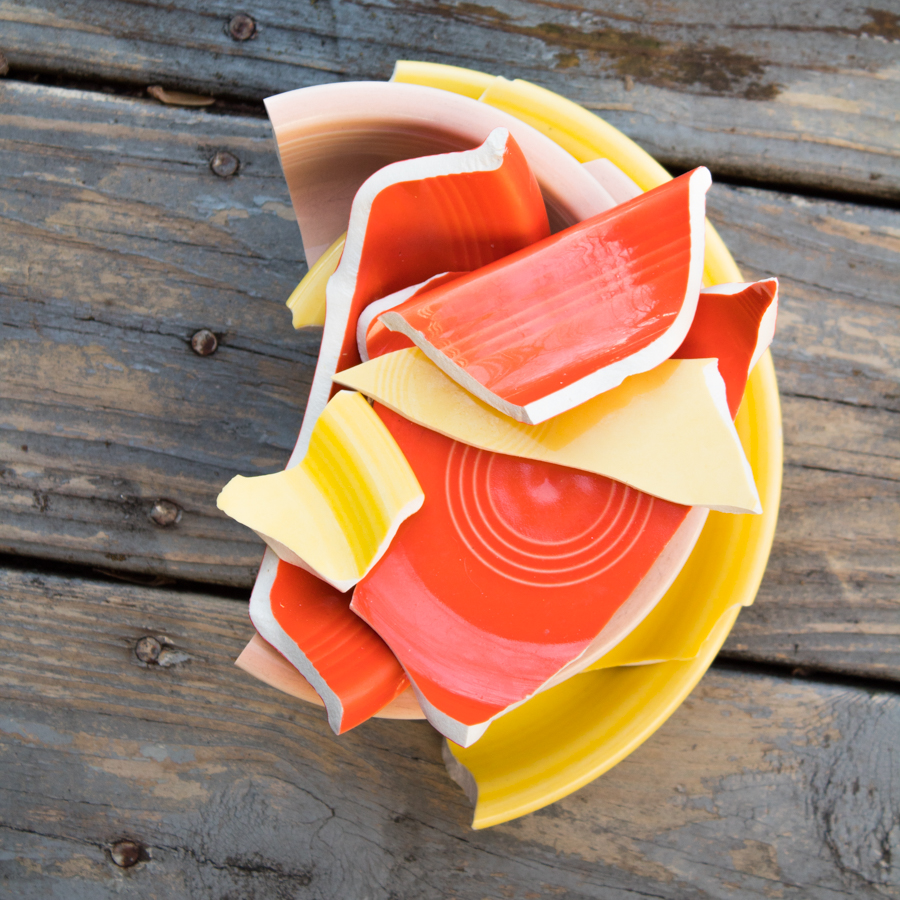
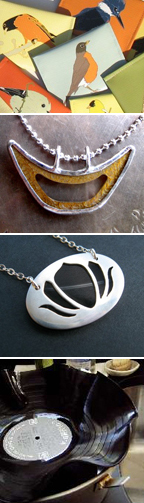
Of course, you can use all kinds of broken dishes for crafting, but I am particularly fond of this colorful and cute broken dish pendant that I recently made from my dearly departed yellow Fiestaware plate.
It’s easier than you think to cut ceramics with a couple of standard tools, and there are loads of ways to finish off the pendant to your taste. This broken dish pendant is a fun upcycling project, and you get to use power tools–what could be better?
Tools & Supplies
To make your own broken dish pendant you will need:
Broken Dish
The local thrift store is my favorite place to buy crafting supplies, and I have no qualms about shattering even the cutest thrifted plate just to make mosaic tesserae or broken dish pendants. I’m equally fond of upcycling my own broken possessions, which is why I have that sad little stack of broken Fiestaware!
Dremel with Diamond Bit Cutting Wheel
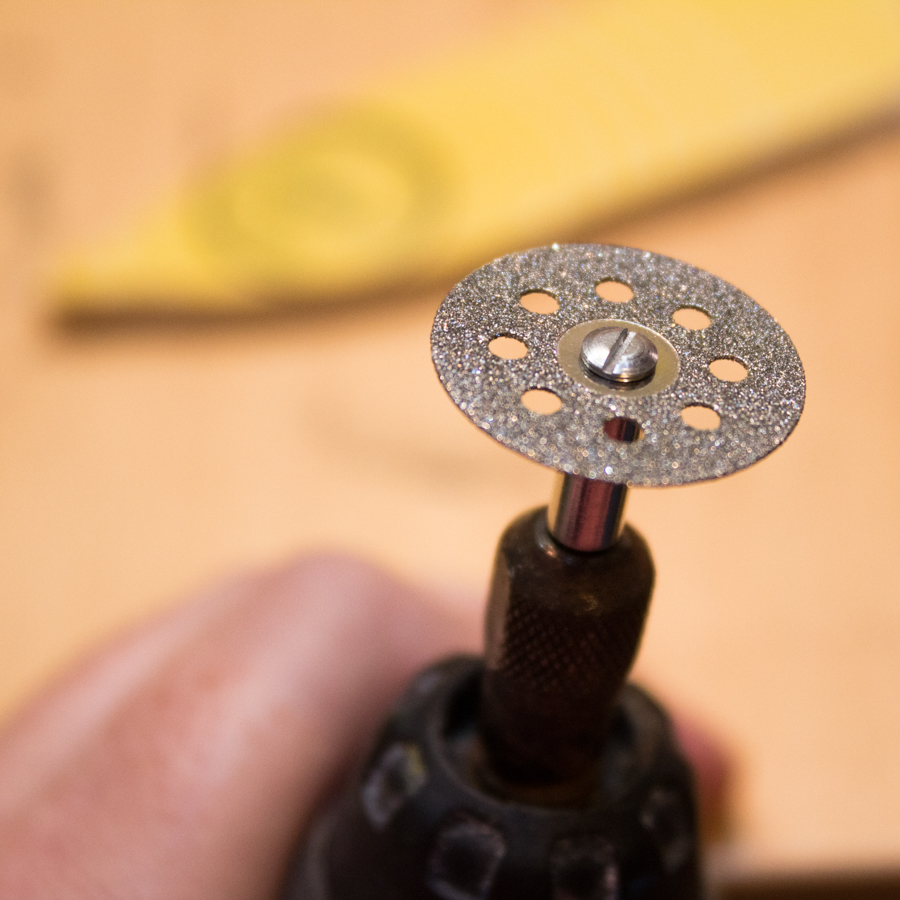
Obviously, you can substitute whatever variable-speed rotary tool you prefer, but my good old Dremel 3000 has been doing right by me for at least a decade now, so I don’t have experience with any other brands.
Grinder or Sandpaper (optional)
You do want to grind or sand away any sharp edges or snags, but you can leave the just plain irregular or uneven bits alone if you’re not feeling picky.
Jewelry Findings
There’s a lot of scope for imagination here! You’ll see me finishing my pendant with soldered edges and a double barrel swivel, but you can use any findings and method you prefer, or even just use a tile bit to drill a hole right through your piece for hanging.
1. Cut the pendant shape from your dish
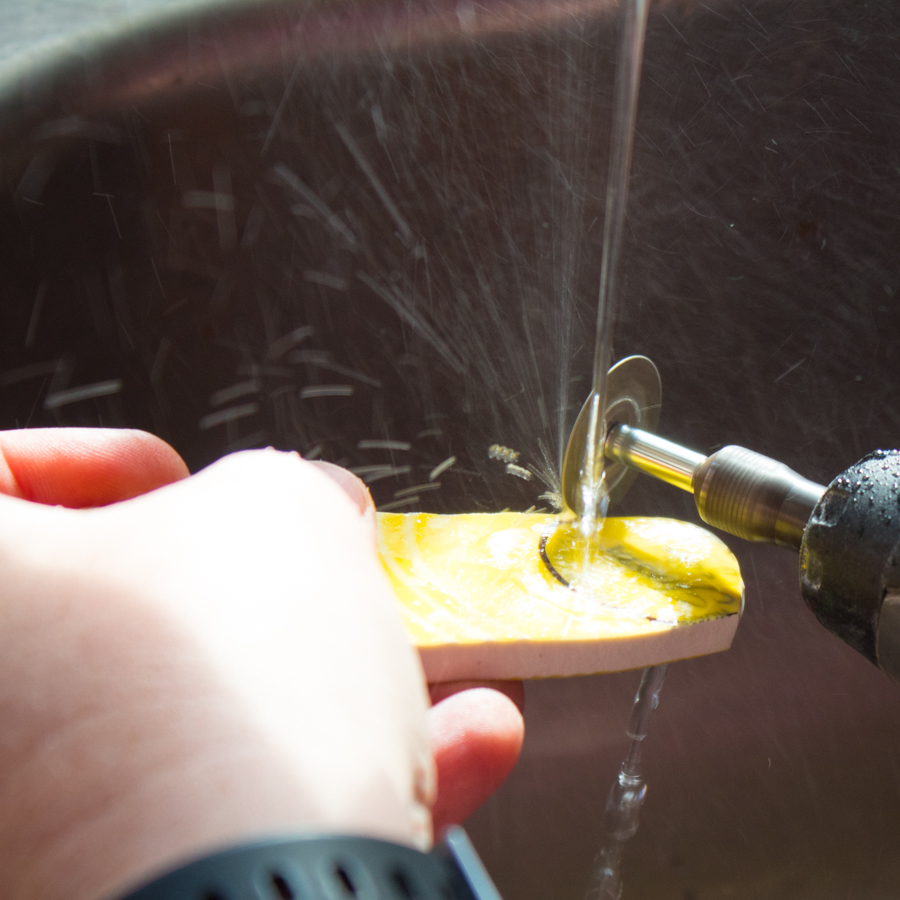
The secret to this project is just how stinking easy it is to cut ceramics with the correct tools. Here, I’m using an old-school Dremel 3000 and a diamond cutting wheel. That’s really all you need!
Notice that I’m doing this cutting in my sink, shamefully getting water droplets all over my Dremel. That’s because the most important piece to this puzzle is keeping your work surface wet: it reduces friction and lowers the temperature (caused by friction), so your piece is less likely to crack and your cutting wheel will last longer.
2. Sand or Grind the Edges of Your Pendant (optional)
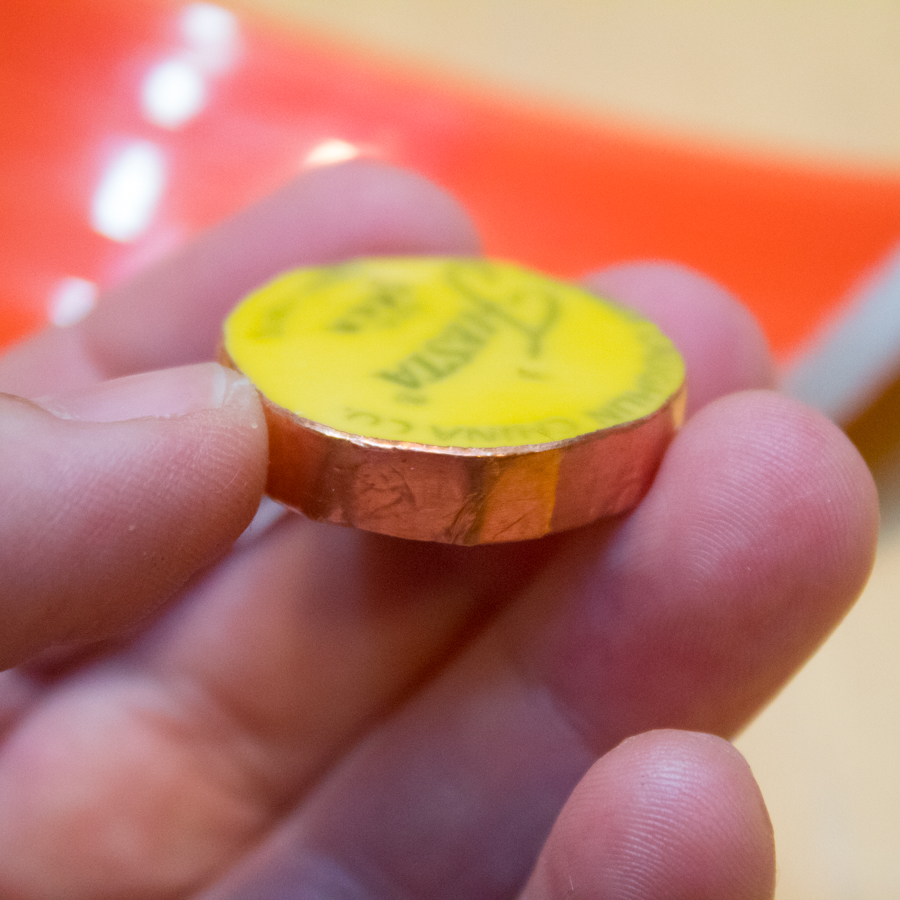
I definitely could have cut this circle more neatly (if you’re worried about making wonky cuts, choose a super simple shape, like a triangle, for your first few pendants. Save the wonky-looking circles for experts like me!), but the soldered edges that I’m planning on will cover a lot of flaws.
All I did, then, was switch out my Dremel’s cutting wheel for a grinding bit to grind down one jagged bit and round the pendant’s edges. Rounding the edges ALWAYS makes a cut piece look more professional!
3. Rig the Pendant for Hanging
You have SO many options for actually turning your broken dish into a pendant!
- Use epoxy glue to adhere a bail directly to the back of the pendant.
- Use a diamond drill bit to drill a hole through the top of the pendant.
- Wrap the pendant in wire, and twist to make a loop for hanging.
- Solder around the pendant, then solder on a jump ring.
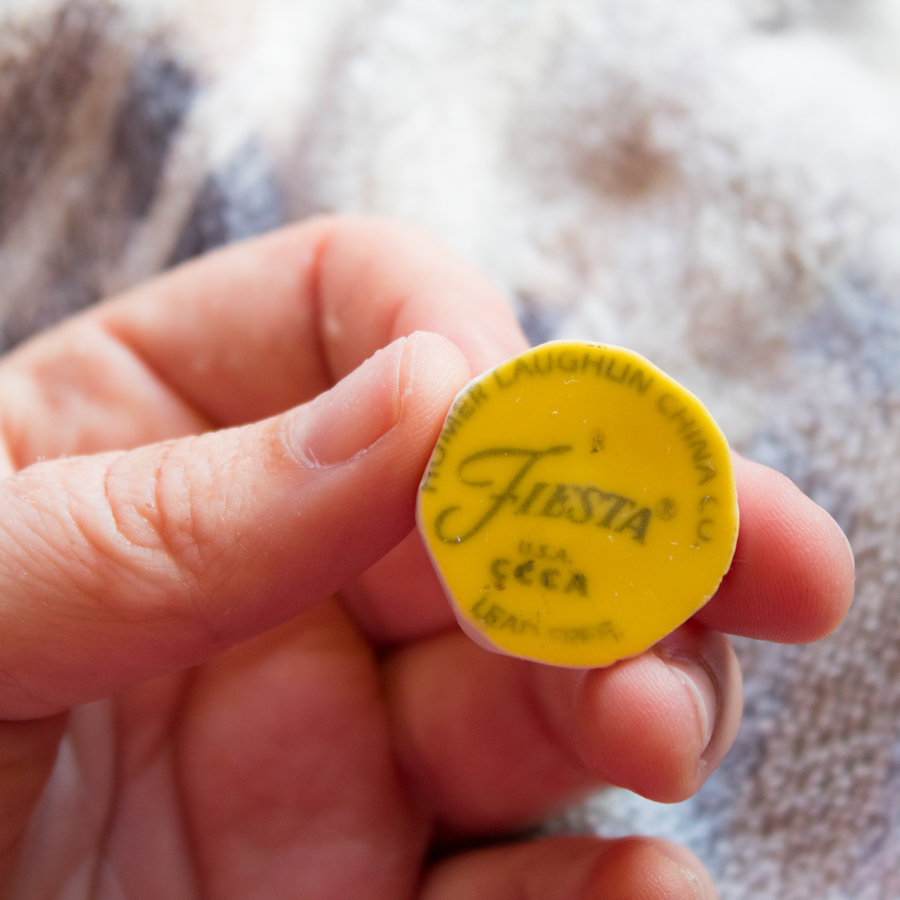
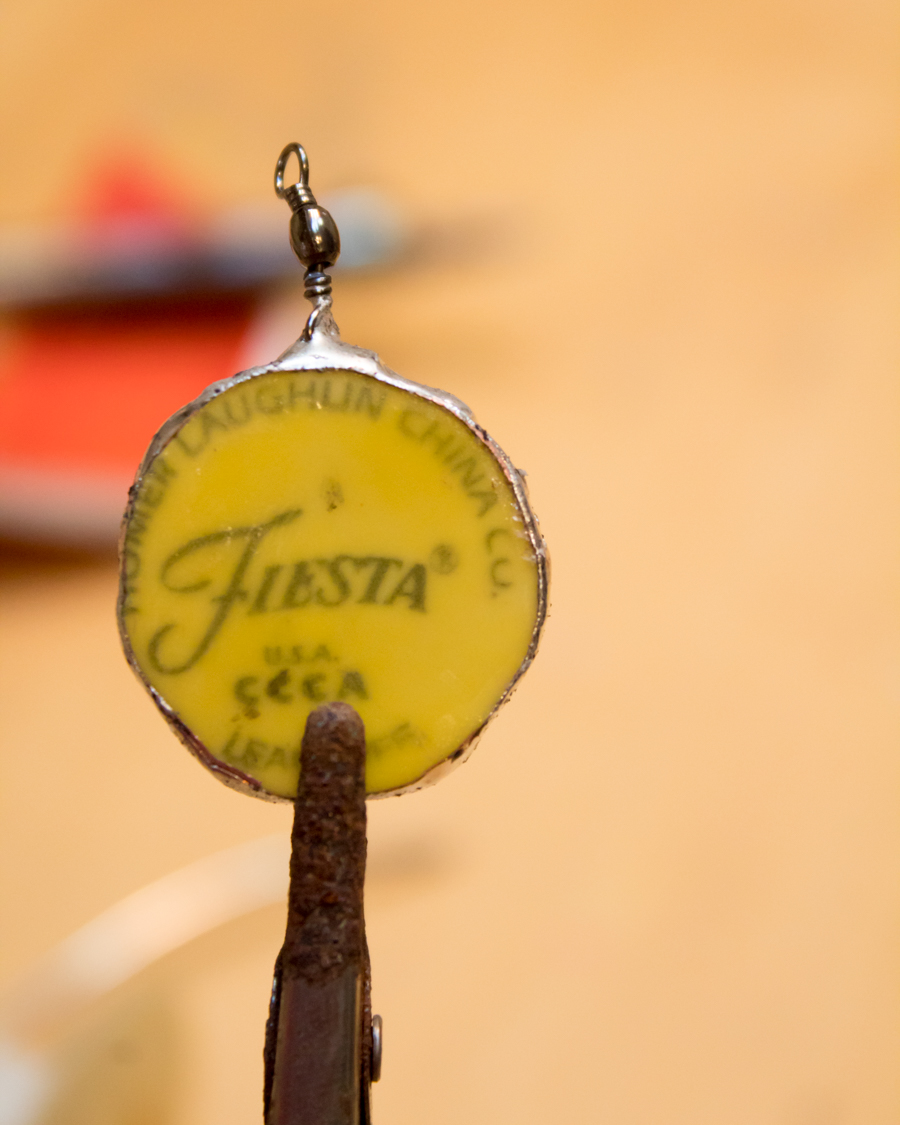
For a piece any bigger than this particular pendant, I like the look of drilling a hole directly through the dish, but this little Fiestaware logo pendant is only 1″ in diameter! Did any of y’all also learn how to solder during the soldered microscope slide jewelry craze?
If so, you’ll know that I burnished copper foil tape onto the pendant’s edges, brushed them with flux, then soldered them with lead-free silver solder. A larger dollop of solder on top allows you to fix the hanger.
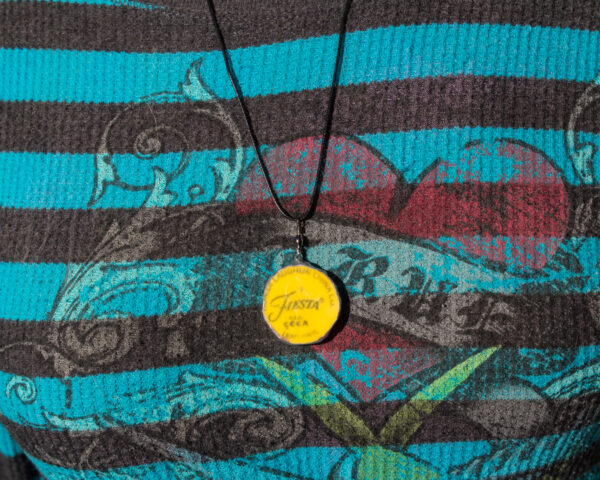
There are SO MANY fun things to do with broken dish pendants like these. You can turn them into necklaces or charm bracelets, add them to suncatchers or windchimes, or embellish pull chains or garlands. Supersize your broken dish pendants and use them as Christmas ornaments or gift tags, or decoupage or paint on top of them to make signage or wall art.
Let me know what you’re going to turn YOUR broken dish pendant into in the comments below!

Great idea!