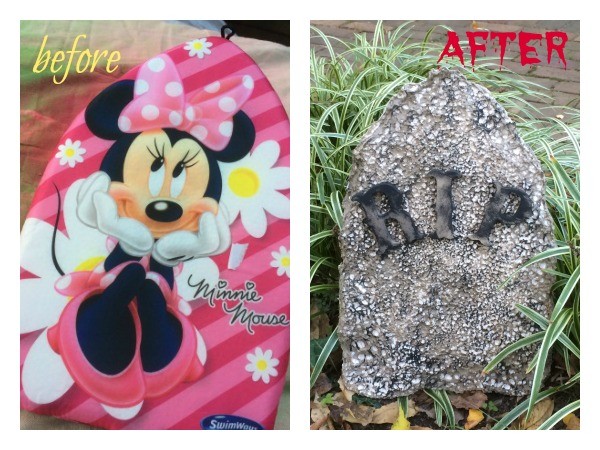
From Minnie Mouse to HAUNTED HOUSE! These DIY Halloween tombstones take you from pool to ghoul with just a few zaps of craft magic.
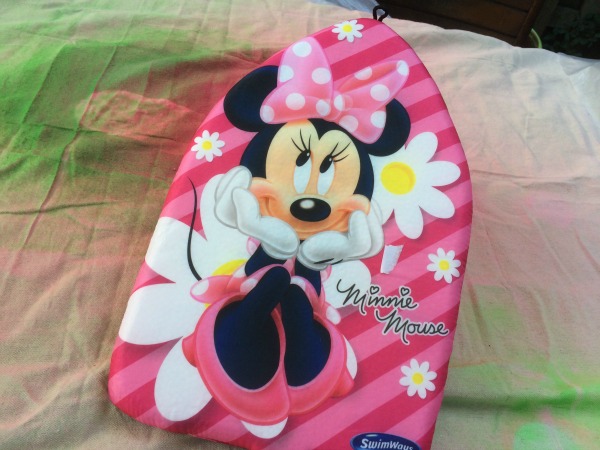
When I see a large quantity of one particular item in the trash, my mind instantly goes into craft mode. So you know those foam kickboards at swimming pools? Kids use them for swim lessons. And I see a lot of older folks using them for water aerobics classes. Well, those poor foam boards take a beating, and they always end up in the trash. The main reason is because they’re super cheap. Most pools, gyms and lucky ducks with backyard pools just pitch ’em at the end of the summer and buy new ones the following year. Ugh.
But have you ever noticed that they’re the exact shape of a tombstone? A little morbid, and probably not what you want to think about because it’s a pool accessory. But hey, it’s Halloween and everything is fair game for a creepy Halloween craft project, right?
So head to your community pool and ask for a few of their old floats. And don’t worry if they’re banged up. That’s even better! It’ll make your DIY Halloween tombstone look old and worn down. If you absolutely can’t find them at a community or gym pool, hit up the end of summer sale at just about any big box store. You can find pool boards for less than a buck, and a lot of stores just trash merchandise that they can’t sell off.
But make the effort to search out the banged-up, ditched ones first. Remember, we’re all about Hallow-GREEN here at Crafting a Green World.
DIY Halloween Tombstones
Here’s What You Need:
+ old kickboard
+ scissors
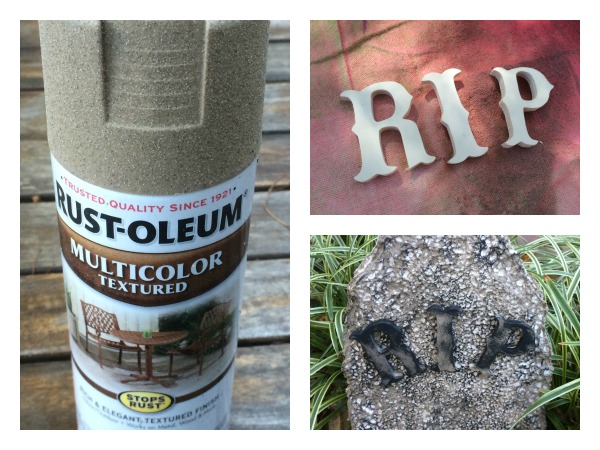
+ textured spray paint (gray, stone)
+ black craft paint
+ paint brush
+ wood craft letters (one “R”, one “I”, and one “P”. Guess what that spells?!)
+ hot glue and a hot glue gun
Prepare your Board
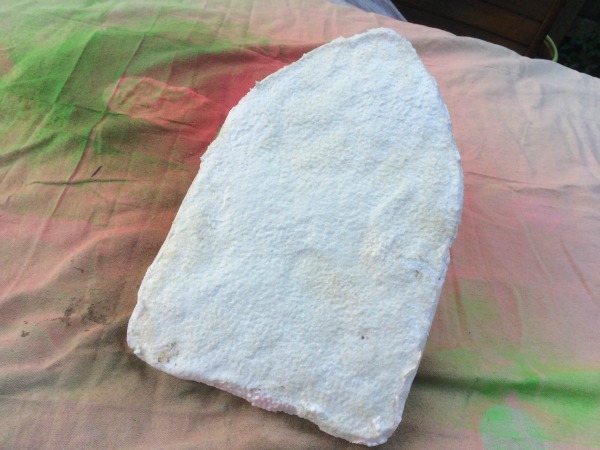
Some foam boards come with a cloth-like covering. Rip that off. (Mine had a Minnie Mouse cover.) Be careful not to break the foam board in half. Remember, they’re mostly made of polystyrene. If little chunks fall off, that won’t effect the end result. If you’re board does break, try to hot glue it back together.
If you have a board that’s entirely made of foam and no outer cloth coating, you’re good to go!
Make some Halloween Magic
1. Before I sprayed my foam board, I put down a few heavy tarps. The spray paint that we’re using for this project is textured, so I wanted to be extra careful that it didn’t get on my patio, furniture or plants.
2. Going by the instructions on the can – meaning to shake really well and stand about a foot back – lightly coat the board.
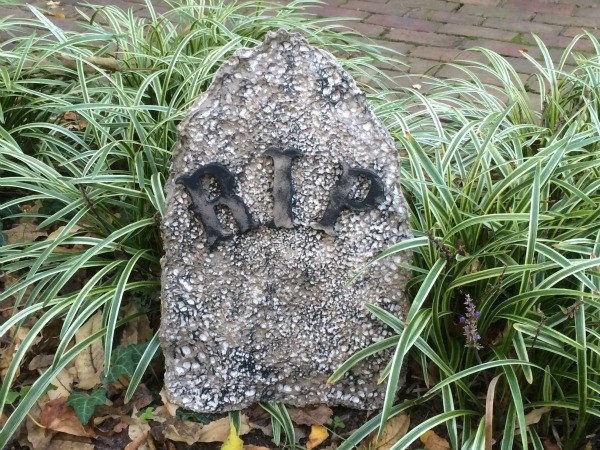
3. Now, watch the magic happen! Something in the paint makes the foam board deteriorate or “melt” a little bit. This actually distresses the board, making it look even more like a tombstone.
4. Once the first coat is dry, give it another whirl. If you’re going to use this tombstone as a prop in your yard, you can also paint the backside. But if it’s just a prop, don’t bother.
5. Also, give your craft letters a few spritzes of paint too.
Add the Final Touches
1. Once your textured paint is dry, add a few streaks of black craft paint to the surface of the board. We’re trying to age the tombstone, so don’t use a lot of black paint – just enough to give it a dark, shading effect.
2. Add a little black paint to your craft letters too. I actually make the letters a little darker than than the tombstone. That way they stand out.
3. Once everything is dry, fire up that glue gun and add the RIP!
Note: If you have two paint brushes handy, use one to add the black paint to your letters and board, and a clean brush to blot it way.
Now What?
- These DIY tombstones look awesome propped up on a table or in random places around the house.
- You can also add a hook to the back and put hang it on your front door.
- If you’re going to use it as lawn decor, I recommend putting it outside the day of Halloween. These aren’t exactly weather proof and might not stand up to the elements.

Random Halloween Hints
- You don’t have to spell “RIP”. Instead, add a spooky message or a date.
- Do bunches and bunches of these so you can make an entire graveyard.
- When packing these away for next year, wrap them in bubble wrap and store them in plastic moving containers.