
When you’re sewing a T-shirt, adding a hood is one of the easier modifications to the pattern that you can make. It’s a modification that also looks a lot harder to do than it is, so get ready to impress all of your friends with your mad sewing skills!
To make a hooded T-shirt, you will need:
a good T-shirt pattern. I’m using the Oliver + S School Bus T-shirt pattern, which you can read my review of here.
a well-fitting hoodie. It should be made from a fabric similar to what you’ll be using for your T-shirt, so a sweatshirt with a hood won’t work here. I don’t always love tutorials that ask you to copy something that you already own–if you own one, do you really need to make another?–but this is the quickest and easiest way to draft a hood pattern. Other options include reading up on how to draft a hood pattern from scratch, or simply asking your buddies if they have a hoodie that you can borrow for five minutes.
jersey knit fabric. The blue fabric for this shirt is upcycled from other T-shirts, but the black fabric is store-bought jersey knit. You can see that they both work well here.
sewing supplies. Don’t forget the ballpoint needle for your sewing machine!
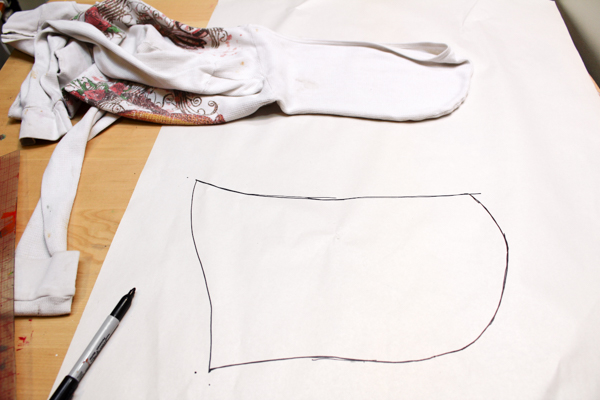
1. Trace the hood. I have some extra tips for copying an existing piece of clothing here. Seriously, masking tape is your friend!
Note the general shape of the hood in the photo above. No matter what hood you copy, that general shape should be the same. Pay special attention to the curve at the neckline–that’s key to a hood that will fit the shirt’s neckline well.
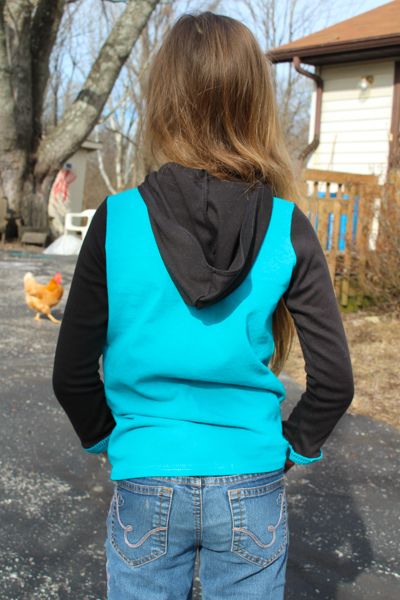
2. Make modifications. You want your hood to slightly overlap at the front–you can get a view of what this will look like both in the top photo here and in the top photo of my review of the Oliver + S School Bus T-shirt pattern. The degree of overlap is up to you, and there’s a lot of wiggle room. In this shirt, for instance, the overlap is maybe an inch, but I sewed a second hooded T-shirt this weekend with a hood overlap of at least three inches, and although it felt like a lot as I was sewing it, it looked totally fine and normal on the kid, and she declared that she liked it even better than the first hood. So there you go.
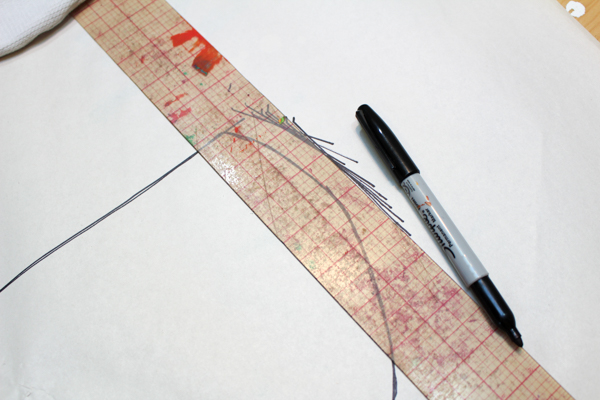
3. Add seam allowance. You’ll need seam allowance for the bottom and the top/back, and a hemming allowance for the front. I’ve gone into detail in a previous post about how to enlarge a curve on a pattern, so you should be all set!

4. Cut out the pattern pieces and sew. You’ll need two hood pieces, and you’ll immediately sew them together to create the complete hood.
You won’t need the neckband from your T-shirt pattern. Instead, you’ll sew the hood on in place of the neckband, centering the back seam of the hood onto the center of the back piece of the T-shirt, then sewing all the way around, overlapping the front pieces of the hood at the center of the front piece of the T-shirt.
You can further modify this hood by adding trim to the front edge or the middle seam (think pony mane or dinosaur spikes), or making it deeper and taller (think wizard’s hood).


