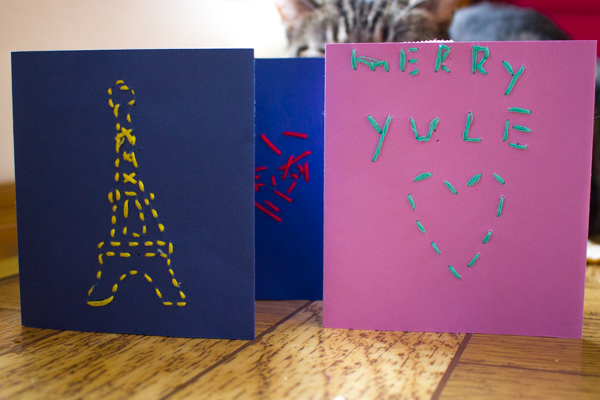
Y’all are going to be shocked at how easy these cards are to make! They look super cute, too–my nine- and eleven-year-olds made the three in this picture, and happily made tons more with me for an entire afternoon of crafting embroidered greeting cards one wintry day.
These embroidered greeting cards work well for every occasion. We sent ours out as Christmas cards, but my younger kid is already planning the Valentine cards that she’ll make soon, and a birthday cake with candles is a simple design.
Got a card-giving occasion coming up? Here’s how to make embroidered greeting cards of your own!
You will need:
cardstock or other paper of similar weight. Cardboard food packaging would work well, and thicker cardboard would make a good postcard or display piece.
pattern (or not!). You can use a line drawing printed on plain paper as a template, but you should also feel free to freehand yourself something spectacular.
awl. You CAN use your embroidery needle to punch holes, but I bought a simple metal awl a few years ago, and it’s come in handy loads of times–definitely worth having in my toolbox!
embroidery needle and thread. If you’re working with kids, especially, do invest in a bunch of colors of embroidery thread. You might be surprised at how much kids love this project, and if they do, it’s nice to give them a large palette of colors to work with.
tape. The secret to making this project easy is TAPE! You definitely need regular old Scotch tape, and either double-sided tape or a glue stick for a second step.
1. Fold your cardstock into thirds. Your goal is to have three panels of equal sizes–you’ll be embroidering onto the middle panel, folding the left panel down over the wrong side of your embroidery, and then writing your greeting on the two inside flaps.
Pro tip: Use the back of a spoon to flatten down your folds for a smooth and professional finish.
2. Punch holes from your template. Flip your card over so that the middle panel is in front of you, with a mountain fold on either side. Put something thick, such as a block of styrofoam or a couple of pieces of corrugated cardboard, underneath the panel.
Place your template over the center panel, and situate it exactly as you’d like. Use your awl to punch holes directly through the template, and through the cardstock underneath it, every centimeter or so, exactly as if you’re making a dot-to-dot puzzle for yourself.
It’s also possible to flip the center panel over so that there’s a valley fold on either side, and then draw a template directly onto the panel. This will be the back side of the panel, however, so your drawing will have to be reversed.
3. Embroider the card. Thread your needle with embroidery floss, but don’t worry about tying a knot. Instead, pull the thread up through the first punched hole, back to front, then tape the end of the embroidery floss onto the back side of the panel. This will keep the thread flatter, and you won’t have to worry about a knot pulling through and ruining your embroidery.
Embroider your card however you’d like. I gave my kids no instructions, and they both chose to use a running stitch for their cards. You can use any type of stitch that you’d like, although, again, be careful with making knots, as they tend to pull.
Any time you’d like to switch colors, just tape the end of the embroidery thread onto the back of the card, and begin again with a new color, taping it off, as well.
4. Tape down the left panel. When your embroidery is finished, turn the card over to the wrong side of the embroidery, and use double-sided tape or a glue stick to fasten down the card’s left panel over that center panel. Now your card looks clean and neat and you have two inside panels to write your holiday greeting on!
If you’d like to make your embroidered card even fancier, you can thread seed beads onto your embroidery thread to embellish the front side of the card, or you can divide the original piece of cardstock into four equal panels, allowing you to embroider the front of the card AND create a second work of embroidery on the card’s inside, as well.