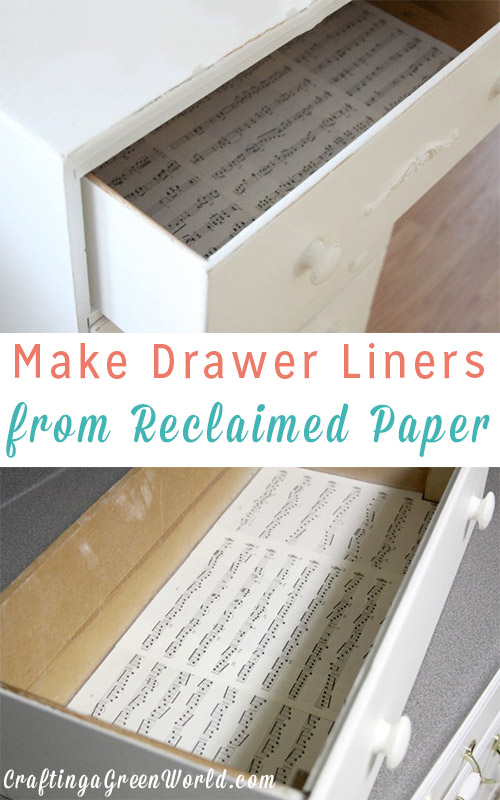
Not all DIY furniture projects require paint Make DIY drawer liners from reclaimed paper of your choice!
Most store-bought drawer liners are made from toxic PVC. Not exactly what you want touching your utensils or clothing, right? Instead of spending money on something less than ideal, you can make DIY drawer liners from any paper you want, and it’s less toxic than the store-bought stuff.
Are the bottom of your drawers begging for a makeover? I bought an adorable little dresser at a garage sale for my craft booth, but the inside of the drawers were interrible condition. There were stains, crusted food– I’ll spare you the details. Instead of tossing the entire piece, I covered the “blah” with beautiful sheet music!

DIY Drawer Liners
What You Will Need:
1. Sheet music or other recycled paper
2. Mod Podge
3. Scissors
4. A ruler
5. A pencil
6. (Optional) Polycrylic. Polycrylic isn’t the greenest crafting supply, but I like to use it because it seals and protects the recycled paper. I use Polycrylic rather than polyurethane because it is water based and doesn’t yellow.
How To Do It:
1. Clean all of the drawers with a natural cleaner or DIY cleaner. Most cleaners will help with any funky smells, too!
2. Decide how you would like to arrange your sheet music in the drawers. I simply put three sheets of the paper side by side, but you could arrange them randomly, too.
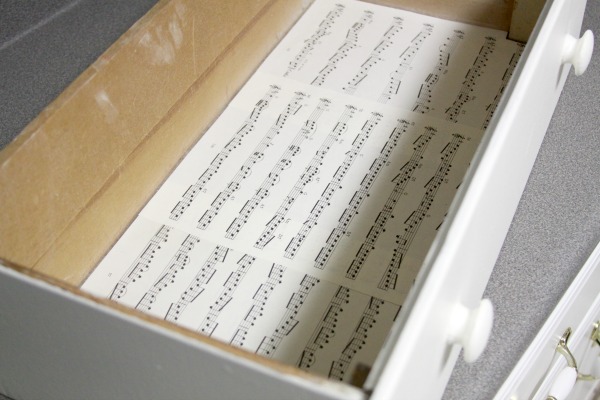
3. Cut the sheet music to the size of your drawer. I used a ruler and pencil to help measure the depth of the drawers, and then cut off the excess paper.
4. Glue the sheet music to the drawer. Continue this process until all of your drawers are completed. Make sure you smooth the paper as best as you can– otherwise you will have lots of wrinkles and bubbles.
5. (Optional) Once the glue has dried, paint on one coat of Polycrylic.
Every time you open your dresser drawers, you’re pretty much guaranteed to smile! Okay, maybe not every time, but doesn’t the paper add a touch of glam? I just love it!
Which recycled paper would you line your dresser drawers with? Share your ideas with us in the comment section below!
Looking for more DIY furniture projects? Check these out:
DIY Furniture Projects: Updating a Vintage Metal Cart
DIY Home: Upcycle an Old Medicine Cabinet into an Unique Shelf
DIY Home: Revamping an Old TV Tray
DIY Decor 5 Ways