 There are many ways to re-use and enjoy vintage papers. For example, you can decoupage a built-in bookshelf with vintage wallpaper samples, alter antique books, and mail out a vintage greeting card.
I’m fondest of re-using my vintage papers to transform modern or trendy projects. I scrapbook with my vintage papers, and let my girls collage with them. I also use them in decorative elements around my home.
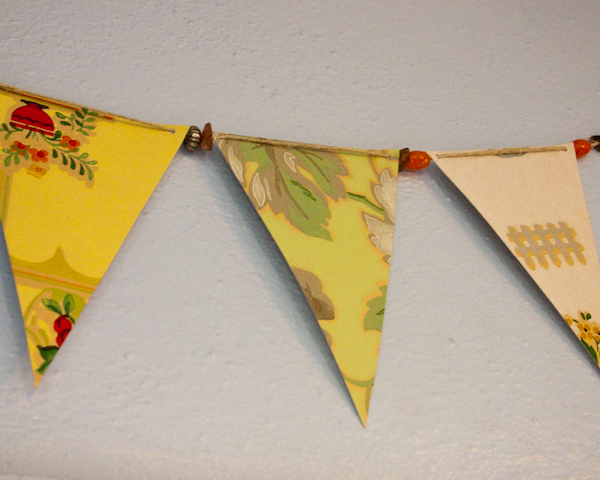
This particular bunting made from vintage wallpaper samples (although any vintage paper will do) is an excellent way to add interest to a space, and the vintage beads that separate each banner encourage a detail-level examination of the work in its entirety.
You will need:
- Beautiful vintage papers: wallpaper samples, stationery, wrapping paper, origami paper, etc.
- Scissors
- Adhesive-backed archival cardstock, or archival cardstock and spray-mount adhesive. I use adhesive-backed cardstock as a less messy and less fussy alternative, but if you have a particular color scheme or pattern in mind, you will likely find a closer match in the wider selection of non-adhesive cardstocks.
- Twine or ribbon
- Hole punch with a diameter only slightly larger than the diameter of the twine or ribbon
- Vintage beads whose holes are wide enough to accomodate the twine or ribbon. My beads come from loosely-strung necklaces found at one very memorable garage sale years ago.
1. The banners that make up a bunting are typically elongated triangles, all the same length. However, an attractive bunting can be made from banners that are of different sizes, or in any of a variety of shapes. Choose the size and shape of the banner(s) that will make up your bunting, and cut out a template from cardboard.
2. If you’re working with adhesive-backed cardstock, cut out all your cardstock banners first, then stick the cardstock to the back of your vintage paper, then cut out the paper around the cardstock banners.
If you’re working with regular cardstock and spray-mount, cut out the vintage paper banners first, then spray them with adhesive, then stick them to the back of the cardstock and cut out the cardstock around the vintage paper banners.
Each way is designed to give maximum protection to the fragile vintage papers, so think carefully and figure out which method you’ll use before you begin.
3. Using your hole punch, punch a hole in the top right and left corners of each banner.
4. Measure out a length of twine or ribbon equal to the width of all your banners, plus an inch or so on the side of each banner where the beads will sit.
5. Knot one end of the ribbon or twine.
6. Thread one bead onto the ribbon or twine, then thread on a banner, passing the ribbon or twine across the front of the banner, not the back. Follow the banner with two beads, then repeat the pattern.
7. After the last bead has been threaded, knot your ribbon or twine snugly against that last bead.
Now your bunting is ready to be pinned against a wall, or tied to more ribbon and hung from pillar to pillar. Either way, it’s gorgeous, isn’t it?


Pingback: How-to: Make Beads from Colored Pencils (You Get to Use Power Tools!) – Crafting a Green World
Pingback: 20 Ways to Reuse Gift Wrap | Care2 Healthy Living
Pingback: Oh Shit, Equinox! - smarterfitter